Early Christmas

img_6605

I feel like Christmas is coming early this year. The Inspired Market is this week here in Rancho Cucamonga and I can’t wait!

I have been working hard getting ready and it is getting so close! So much good has come from this endeavor that even if they cancelled it tomorrow, I would feel like I’ve overcome something huge.

Most of the good is intangible and probably not even recognizable outside my home but it is very real.

Being able to create alone, without interruption has been luxurious and restorative than any pampering I can imagine. Seeing an idea and trying it immediately has awakened a part of my brain that has been shut down for awhile. Like using my arm again when it has been in a sling for weeks. Something that has come as a surprise to me is how gratifying it is to see all the tools I have collected over the years. Several times over the last few weeks I would think, “I wish I had some pinking shears.” or some other tool and then I would come across it in when I was looking for something else a few minutes later.  It is also really good for me to have a hard deadline, I’m a terrible procrastinator and this has given me a specific goal that I can’t put off.

So, let me see:

Canopy  Check!

Lights  Check!

Rubbermaid tubs full of inventory  Check!

Business license and seller’s permit  Check! Check!

I feel excited, happy, anxious and ready, all at once. Eeeeeeek! Wish me luck!

Front Doors, Hot Dogs and Inspiration

You know that cartoon with two people are stuck on a deserted island and they are really hungry?  Then one of them looks at the other and all he can see is a big hot dog?  Well, I felt like during my first visit to Palm Springs a few years ago.

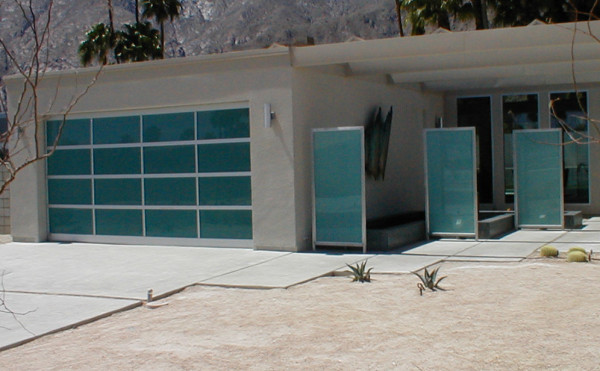
mid mod garagephoto by glassgaragedoors.com

I knew it would be fun to visit with friends, eat good food and do a little site-seeing but I had no idea that the town would be so visually appealing.  I didn’t know that much about Palm Springs and I’m not sure what I expected exactly, but I didn’t expect it to be so handsome.  The homes, the signage, the walls, the accents, colors, mail boxes, everything was classic Mid-Century Modern design and I couldn’t get enough.

Because of the clean lines, bold shapes and simplicity of Mid-Century Modern, it easily lends itself to quilting.

As we drove around, everything I saw became another quilt in my head; I particularly loved the doors, like the one above.  My brain was on overload with ideas and when I got home, I sketched 30+ quilt designs in my notebook.  I have been dying to get started on some of them.

I’m afraid none of the pics I took are useable but I looked around and found a great post written by Mackenzie Horan, that highlights what I am talking about.

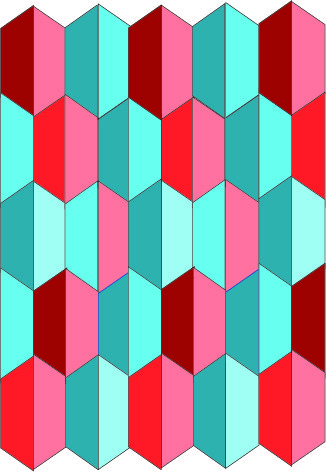
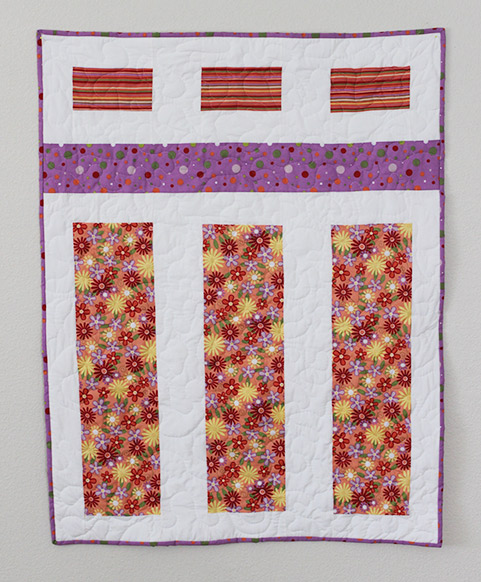
This is my first Palm Springs inspired quilt in a series I’m calling “Mid-Mod”.

mid-mod-1

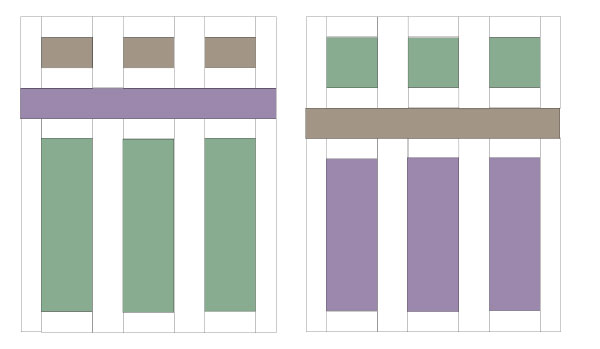
What do you think? I’m happy with it although, I think if I make this one again, I will use squares for the shapes at the top.  The rectangles don’t look generous enough to me.

I’d love to hear where you find inspiration? Nature? Blogs? Fabric Stores?  Are shapes or colors what inspire you or certain fabrics or designers?

Gorgeous Nepal

150257,xcitefun-when-they-enjoy-holi-colors-day-20

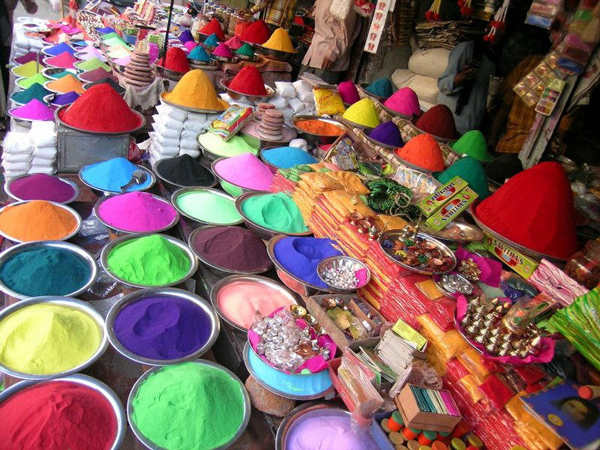
This next quilt was made for a friend at work, as a gift for her first baby.  Her parents are from Nepal and that heritage is very important to her, as it should be. I wanted to make a quilt that had a taste of Nepal, but I wasn’t exactly sure what that meant. I googled “Nepal colors” to see if I could get some ideas. The photo above, from the site Gorgeous Nepal, was my favorite and it started my brain churning. So many colors and shapes and textures and patterns!

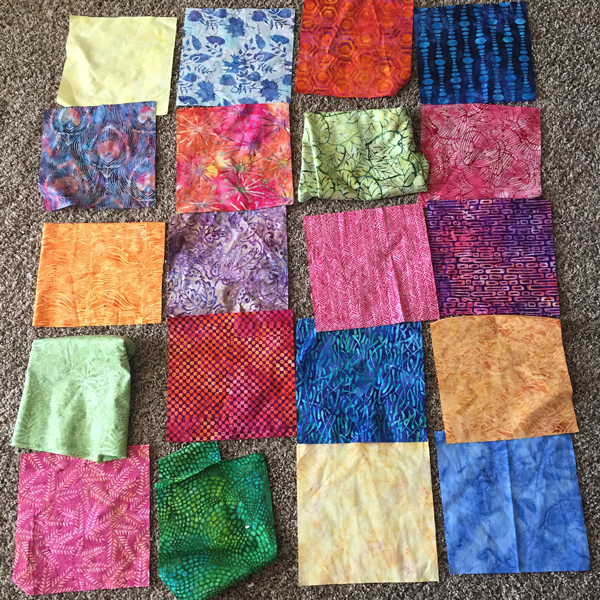
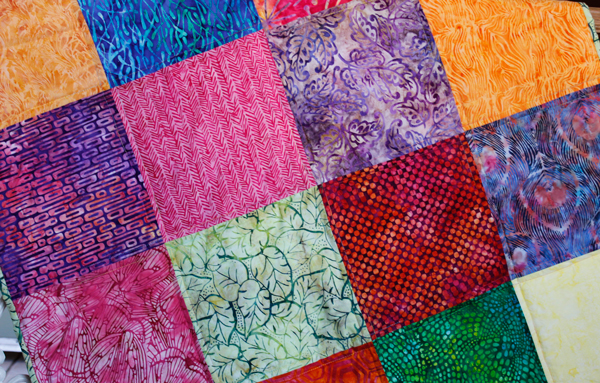
I ended up using batiks, with a very straightforward block pattern. I wanted simplicity so the colors could be the focus.

Gorgeous-Nepal-1

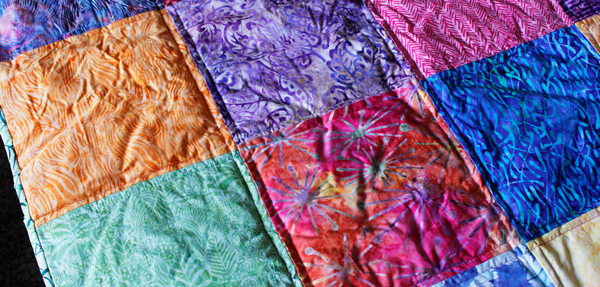
The quilting was simple as well.

Gorgeous-Nepal-5

Here it is finished. I love the colors and the different patterns; I don’t think I will ever tire of working with batiks.

Gorgeous-Nepal-4

This quilt was fast, uncomplicated and I want to make another one but much larger.

What about you? Do you have fabrics or colors, you return to again and again?


Mid-Mod 1

mid-mod-1

Over at Pincushion,  I wrote about a wonderfully inspiring trip I took to Palm Springs a few months ago.  This quilt is my first to be born of that inspiration.

I’ve had this happy fabric in my stash for a few years now and was finally able to put it to good use.  I really like how it turned out although, I think if I make it again, I will use squares at the top.  I don’t think the rectangles are quite generous enough.

mid-mod-1-side-by-side

Below is the pattern I wrote for the one with the rectangles.  I will remake it using the squares and post that in a week or two.

This finished quilt measures approximately 37″ x 51″ and makes a generous baby quilt.  It took me about 5 hours from start to finish.  This is one you could definitely finish in one day.  (These instructions assume the reader knows how to quilt and bind.)

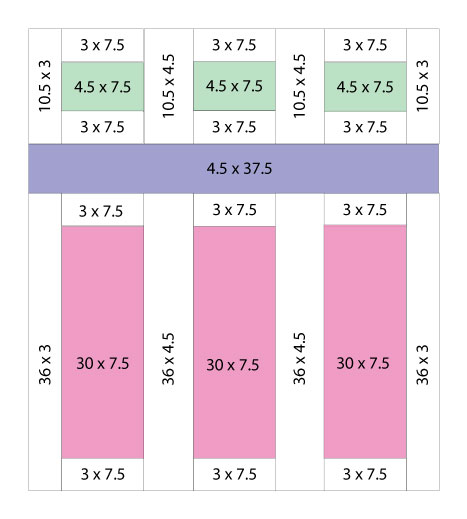
mid-mod-1-rec-measurements-1.5

Let’s get started.

You will need three different colors of fabric plus a background fabric, back and binding, for this quilt.

Using the measurements below, (I added the quarter inch scant to these written measurements) cut your fabric pieces.  Remember to add 1/4 inch seam allowance.

Color 1:

  • 3 rectangles 4″ x 7.5″

Color 2:

  • 1 rectangle 4.5″ x 37.5″

Color 3:

  • 3 rectangles 30″ x 7.5″

Background:

  • 12 pieces 3″ x 7.5″
  • 2 pieces 36″ x 3.5″
  • 2 pieces 36″ x 4.5″
  • 2 pieces 10″ x 3″
  • 2 pieces 10″ x 4.5

Your back should be about 40″ x 55″.

Your binding should be about 190″ long.

Once you have your pieces cut, you are ready to piece your quilt top.

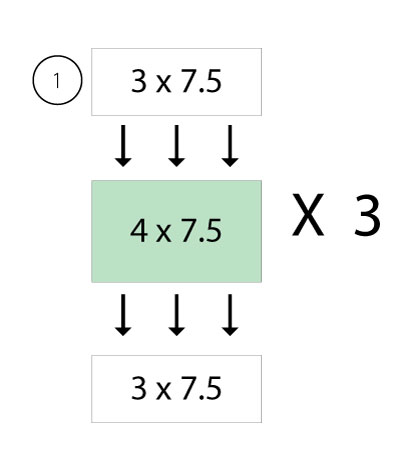
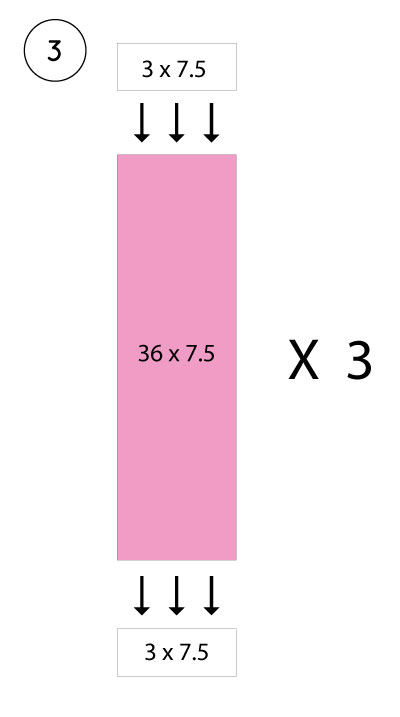
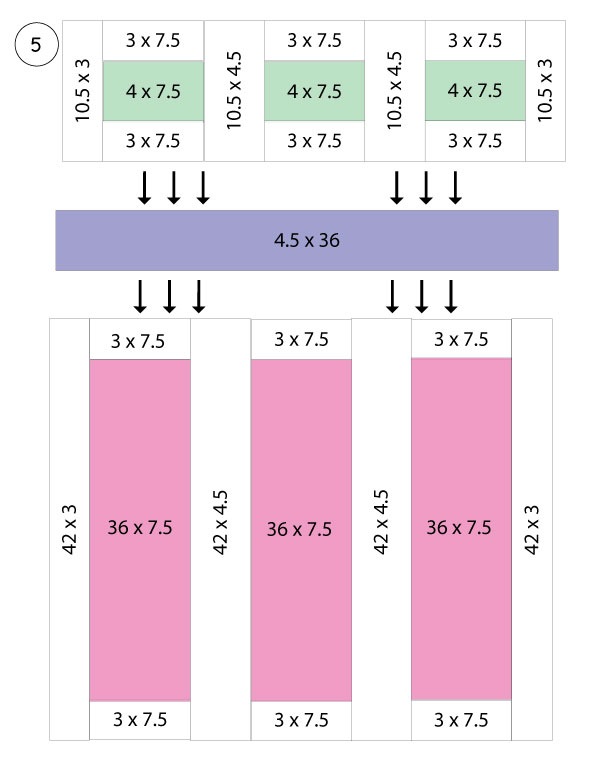
mid-mod-1-rec-step-1mid-mod-1-rec-step-2


mid-mod-1-rec-step-3


mid-mod-1-rec-step-4


mid-mod-1-rec-step-5Woohoo!  You’re done!

Now make your quilt sandwich, baste, quilt and bind.  Please share your finished quilt with me.  Send your pic to [email protected].  I love seeing what you’ve done and how you’ve made it your own!

Abbigail’s Quilt


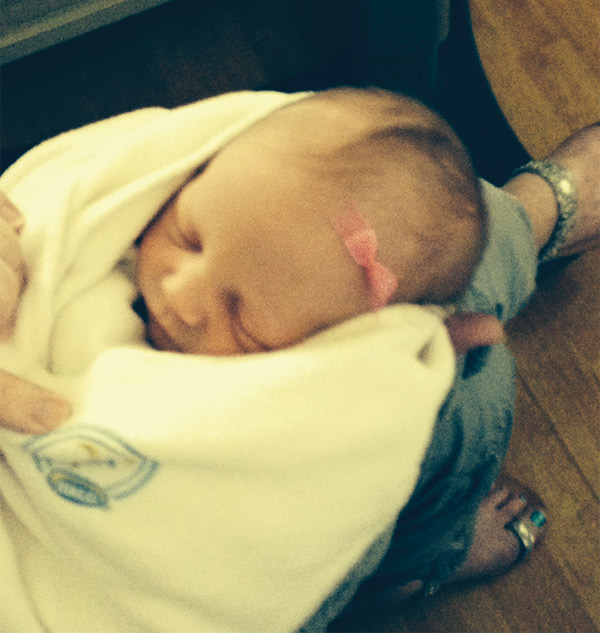
pink-bow

Last week we celebrated when our niece Kaydee and her husband Trevor’s baby girl was born.  She is the first baby born to the next generation of Rodgers and she’s perfect!

There is just nothing better than a new baby!

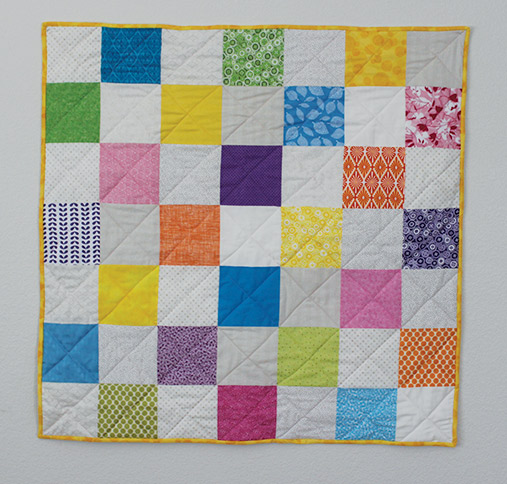
My sis in law Tonya sent me a picture of her sweet nursery.  They used creams and lots of happy colors to decorate.  With that in mind I set about making a quilt.


Abbigail's-Quilt

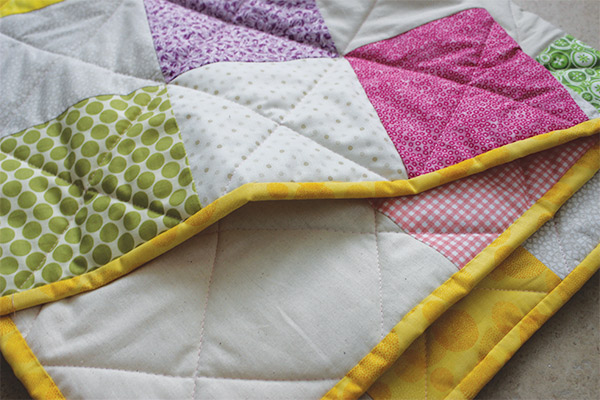
This is what I ended up with.  It was fun to use so many colors.  I quilted a simple criss-cross pattern to go along with the simplicity of the rest of the quilt.  It makes me smile every time I look at it.

Abbigail's-quilt-close

Welcome baby Abbigail.  I hope someday you understand how many people love you and want the very best things in the world for you!

XO

Regina’s Wedding Quilt

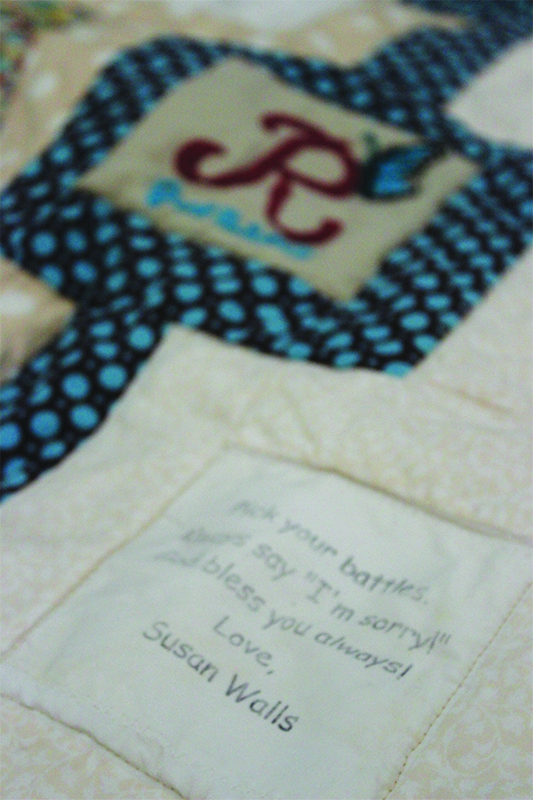
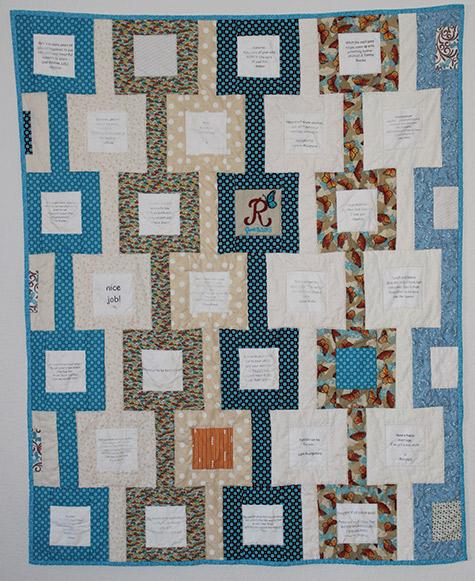
This week I made this quilt for my dear friend Regina.  Her son was married last June.  At the wedding she asked people to write marriage advice on cards she put on each table.  Then she printed the advice onto fabric.

Rooney upclose

A few weeks ago she sent me the printed fabric as well as a bunch of other fabrics with a note to put it together somehow.

When Regina gave me carte blanche to do what I wanted, one design came to mind.

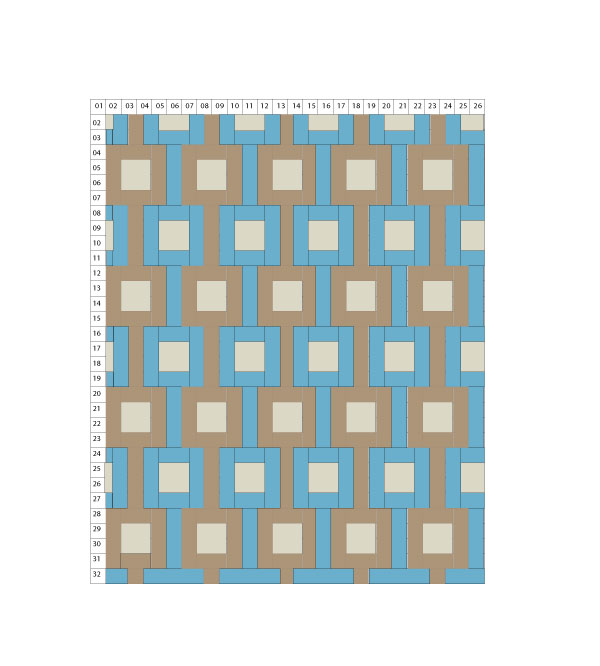
PS-1I knew it would be perfect to frame the advice squares.

I’ve seen several of them that I like, this one and this one and this one;  I’ve been wanting to make one for years.  This was my chance.

With the fabric Regina sent me I made a light-dark, light-dark pattern.

PS-finished

I was able to quilt it and bind it and send it off in plenty of time before the newlywed’s first anniversary.

What do you think?

Watch for the pattern, I should have it up soon.

Foot Pedal

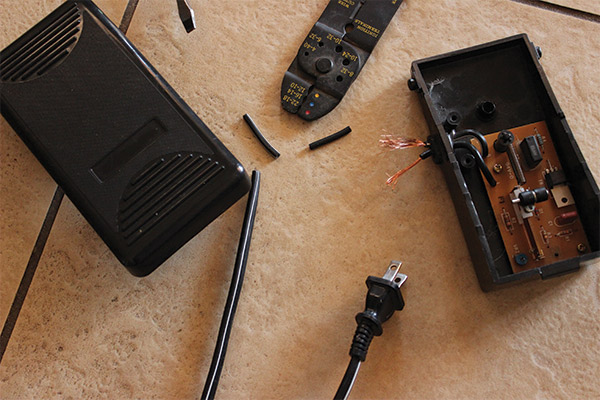
The foot pedal on my sewing machine had some sort of short in it and would stop and start randomly when I was pressing it. Not cool!

I took it apart to rewire it but I couldn’t find the break.

rewire

I gave up and ordered a new one.   It came this weekend and now we’re back in business!

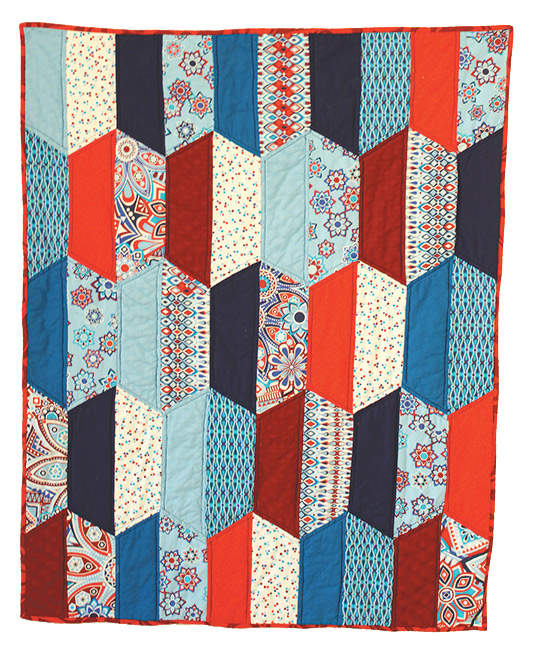
Happy Trapezoid Pattern

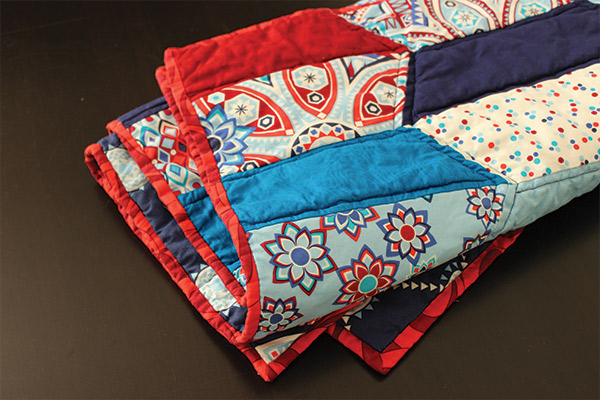
happy-trap-folded

This quilt is 38″ x 50″ and took me approximately 15 hours to make from start to finish.  I did it over 3 days, which is how create most of my quilts.  

Day one, I cut and arrange.

Day two, I piece the top and baste the quilt sandwich.

Day three, I quilt and bind the quilt.

Tools you will need:

  • Circular cutter
  • Cutting mat
  • Cutting ruler with a 20° mark or a template
  • Pins
  • Seam ripper
  • Iron

Materials you will need:

  • 10-14 different fabrics, 1/2 yard each    When choosing your fabrics you will want even numbers of prints and solids as well as even numbers of dark and light.
  • Fabric for the back, 2 yards
  • Fabric for the binding, 1/2 yard
  • Batting

Directions: 

Begin by cutting your fabric into trapezoids.

I start by cutting 4.5″ strips and then sewing them together to make one long strip.  The length will depend on how you many colors you use.  Each trapezoid will be 13.5″ long.  Knowing that, if you need three trapezoids of that color, the length will be about 40″ long.

happy trap 11

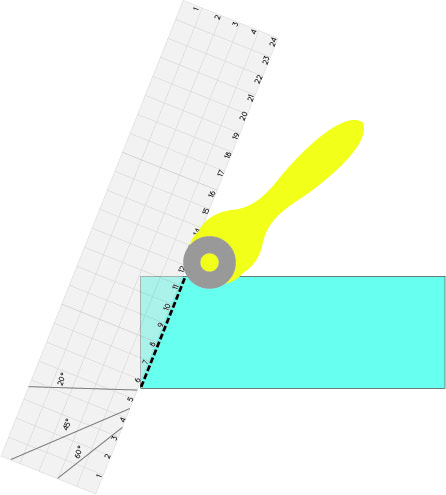
Then using the 20° mark on my ruler, I cut a 20° angle creating the first edge of the first trapezoid.
happy trap 13


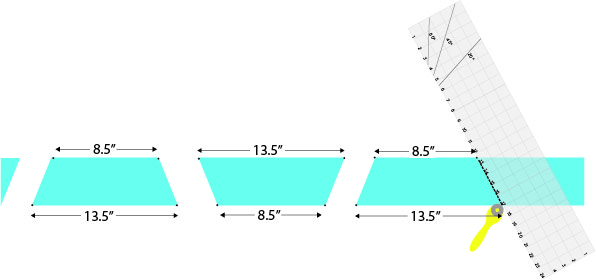
Then I measure and mark 8.5″ and 13.5″, line up the marks and made another cut.
happy trap 12

You may find an easier way to do this step.  If you do, you are bound by Quilter’s Law to share it with me.  🙂

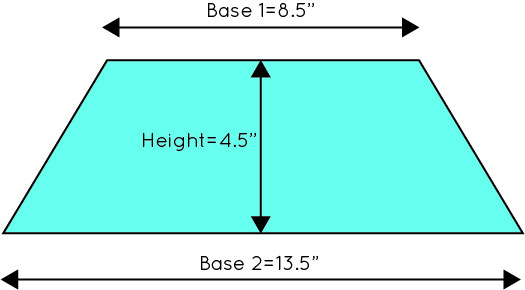
You will need to cut a total of 50 trapezoids.  Base 1= 8.5″   Base 2=13.5″   Height =4.5″
happy trap 2

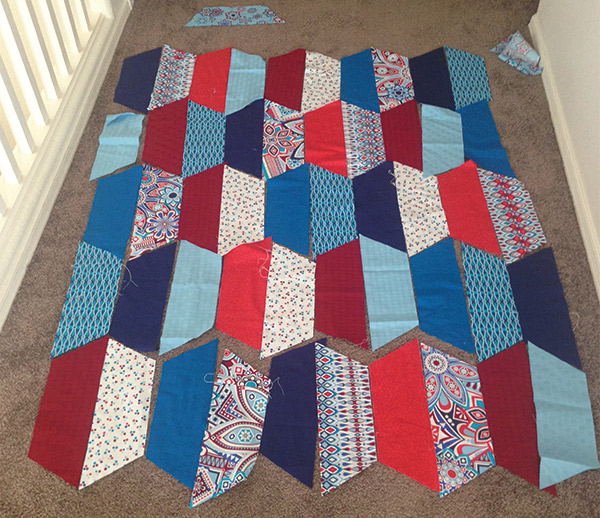
When all your fabric is cut, begin arranging.  Five down and ten across.

Tip:  If the arraignment isn’t what you imagined, don’t be afraid to change things up.  It is hard for me to switch gears when things don’t work out as planned, so I’m saying this mostly to myself.

With this quilt, I planned on doing red solids with red prints and blue solids with blue prints but I ended up with a solid-print-solid-print sequence.  Play with it until it looks good to you.

This is what I ended up with and I love it.
jm-arraingment

*Tip: Take a picture of your arraignment so you have a reference if you need it.

Begin piecing each column.  There should be five trapezoids in each column.happy trap 6

Piecing angles can be tricky at first.  If you line up your corners and then sew it together, (as shown below) your edges won’t line up.  Booooooo!
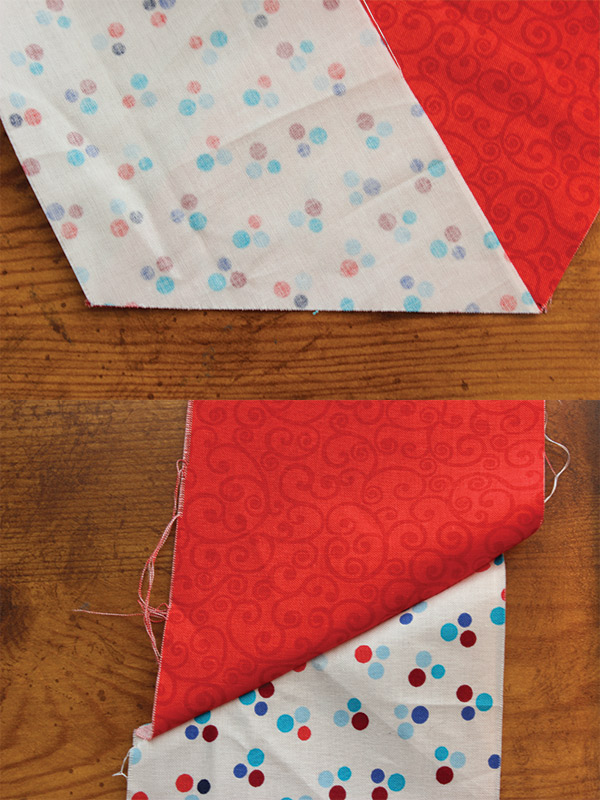
angle-pin-no

You will need to stagger the corners using the 1/4″ scant seam allowance (as shown below) then your edges will look like this.  Yea!!!
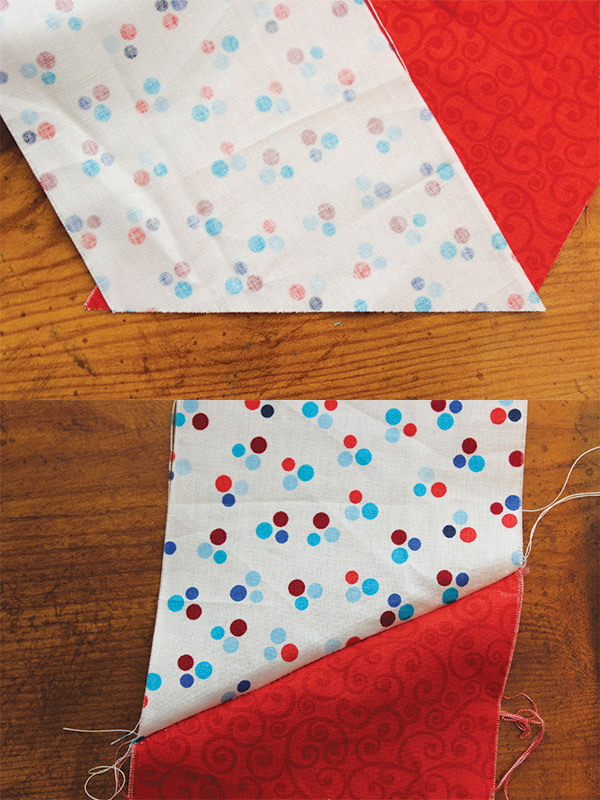
angle-yes

I pin my first five or six pieces to make sure I’m right on but after sewing a few I can usually eyeball it.  

Double check the edges after each seam is sewn, to make sure everything is lined up correctly.

Remember to press each seam as you sew.

Repeat until all ten columns are sewn.
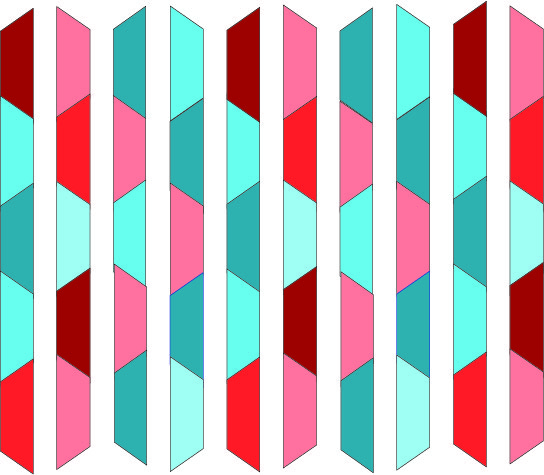
 

happy trap 7

Now we’re going to start sewing the columns together.  Pin column one to column two, where each of the seams meet and sew.

happy trap 10

Confession: Normally, I go to great lengths not to pin.  This is one instance, however, that lots of pinning is worth my time.  Pinning will make sure all your seams meet together.

Continue to pin and sew each column until all 10 columns are sewn together.
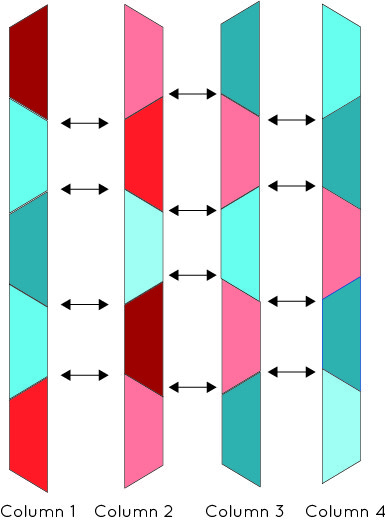
happy trap 4


happy trap 5

Press all your seems one more time.  This will help to make sure the edges of your quilt are nice and straight.

Square up the edges by cutting off the extra fabric.
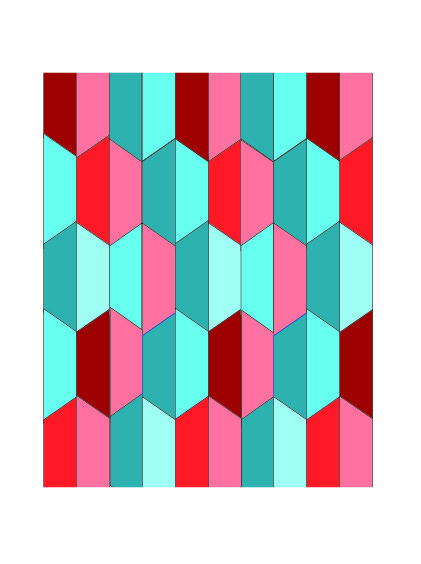
happy trap 9Your top is done!

Next, make your quilt sandwich.
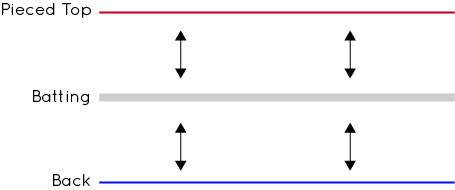
Quilt Sandwich

Baste your quilt.

Quilt your quilt.

I quilted along the angles to make this chevron design.
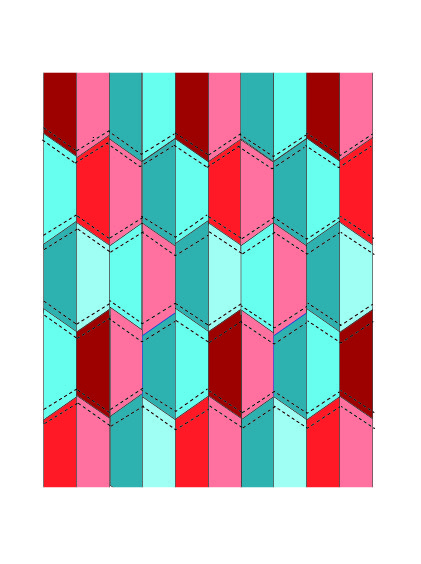
happy trap quilt 1I felt like it needed a little more quilting so I went back and quilted the inside of every other trapezoid.  In this case it ended up being all the solid trapezoids.     happy trap quilt 2
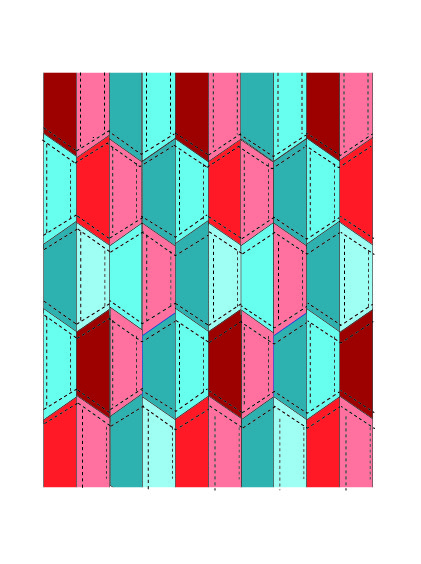
I love how it looks.

happy-trap


Bind your quilt.  There are many ways to bind a quilt.  If you are new to quilting there are a zillion tutorials out there.  I think Allison at Cluck Cluck Sew has a great tutorial for machine binding.  

You’re done!  This is mine.
Happy-Trap-gallery

I’d love to see your finished quilts!  Please send any pictures you’d like to share to [email protected].

Goals

Because Jan. 1st was on a Wednesday and the kids don’t go back to school until Monday, I feel like I have a few extra days to finish up a a couple of things from 2013 before our year really starts tomorrow.

The last thing I was determined to finish before the year was up was to get these darn photographs scanned and saved to an external hard drive.  I sorted and began scanning them last summer but they were put on the back burner again and again.  And that box sat here mocking me every time I walked into the family room.

I have about 3/4 of them done and I am going to try and finish them up today.  I will be so glad to have them all safely on a hard drive and out of my family room!

Once that is done I get to start on this year’s quilts!  I have several quilts I want to work on this year:

Untitled-1

1.This skill builder Block of the Month project  by Alyssa aka:Pile O Fabric looks so good to me.

2. A snowflake quilt, isn’t this one pretty?

3. A pixelated quilt, there are some great ones out there but I think I want to start simple.

4. A video game 8 bit quilt, Mario is the best.  I like this Tetris one too.

5, 6, 7, 8.  These quilts are inspiring me right now as far as baby quilts.  We have quite a few friends having babies this year and our very first great niece or nephew is expected in June!!

9. I would also like to try batik fabric dying.

Whew!  Wish me luck!

Wave

I love this painting.  I just got off the phone with a man in Guam to ask about buying it.

wave

I’m thinking of ways to translate it into a quilt.  What do you think?