
Surf Rule #895
Tuesday, September 10, 2013
Tuesday, September 10, 2013
Monday, September 9, 2013
I’m in the process of cleaning out and reorganizing my quilt room and thought I would let you come along.
Step #1 Purge
We’ve lived in this house for two years now. Even though I use it a great deal for sewing and other projects, my sewing room had become the catch-all for all the house odds and ends. It was a mess and it had gotten completely out of hand. It was so bad I moved my sewing machine into the dining room so I could work unencumbered.
Earlier this year I got a bee in my bonnet and started cleaning it out. I cleaned out cupboards and drawers and bins. I dusted shelves and vacuumed corners and edges.
I went through all my fabric. There was a lot and it was time to say goodbye. Some of it I have had for 25 years. 25 YEARS! Holy cow! If I wasn’t going to use it in 25 years, chances are I wasn’t going to use it at all. We’ve moved a lot and I’ve learned to be pretty good about getting rid of stuff but the one exception? Craft stuff. I’m not sure why but I hoarded that stuff. Everything from glitter to fabric paint to finished and unfinished projects I thought I could use later, as well as an enormous amount of fabric.
It felt good to get rid of all those projects finished and unfinished and all those little odds and ends. And I threw out so many scraps! What in the world was I keeping them for? I donated anything that was useable and threw out anything else. I took stock of my quilting tools and I organized my knitting stash and tools as well.
It hadn’t occurred to me that I would blog about this so there is no before picture. 🙁
#2 Figure Out What You Need
I spend a lot of time in my sewing room, and I want it to be a place where I feel inspired and excited when I get to spend time there.
I’m not a very organized person but I’ve learned that I am happiest whenI know where things are and can find things quickly. Also when I can clean up quickly and that only happens when everything has a place. Because I don’t come by organization naturally I needed help. I spent time of several different blogs and Pinterest. It is good to see what has worked for others and to honestly consider what will work for me and what will not.
For a usable quilting room, I really just need four things.
I need a place to store fabric/tools/books/patterns/inspiration and current projects. They need to have specific places. This is my storage at present.
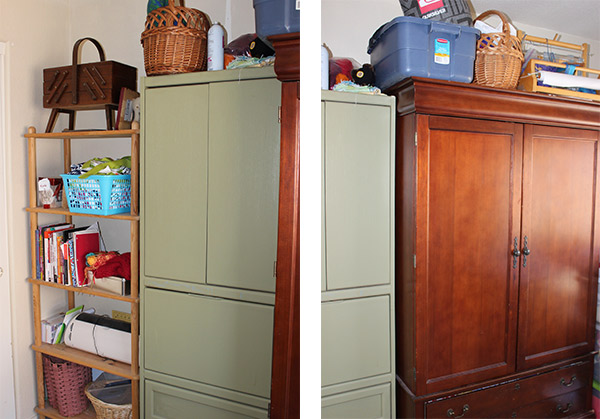
The eclectic shelves and cupboards I have work okay too but can get jumbled quickly when I’m digging around looking for fabric or other supplies. I wish I had something a little more uniform.
I’ve been on the search for good looking ways to store fabric and yarn and tools. Right now I’m leaning toward these shelves, with see through plastic buckets to organize my fabric and other craft tools and projects. The adjustable shelves will make it possible to get all the my bolts out of the closet so I can use it for other things. I’m not really crazy about the plastic buckets but I can’t see anything that will do the job better. Suggestions??
I need a place to cut/plan. Love my cutting table and area.
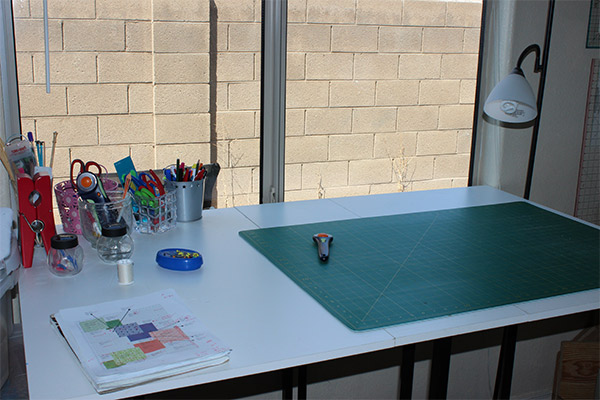
My friend Gretchen gave me the counter hight table and it fits perfectly in the window sill. The only thing I wish I could add is an inspiration wall/board. Sometimes I need to live with a pattern or fabric for a while to decide how best to use it.
And, well, I could live with out that ugly brick wall but it reflects the most scrumptious light in the afternoons.
I need a place to iron.
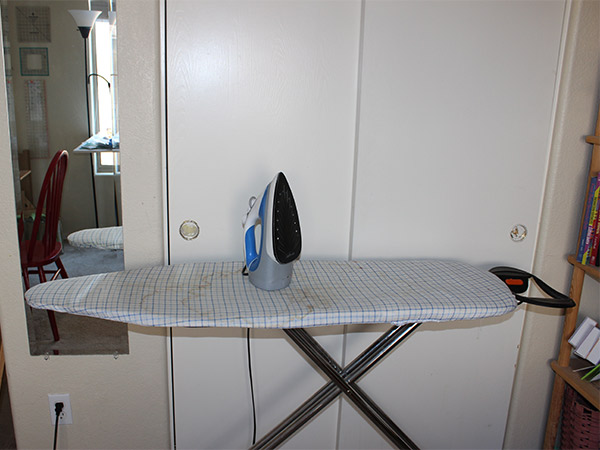
I need to upgrade on my ironing board or maybe just a new cover. (I know gross.) Even though I’ve washed it I always use a towel on top, as a precaution. I don’t trust that is sin’t going to stain my fabric.
My iron works fine, it puts out the perfect amount of steam for pressing seams. The only problem is that it is top heavy so it tips over and falls all the time. I’m wondering if should get a new one that I don’t have to fight with.
And of course I need a place to sew.
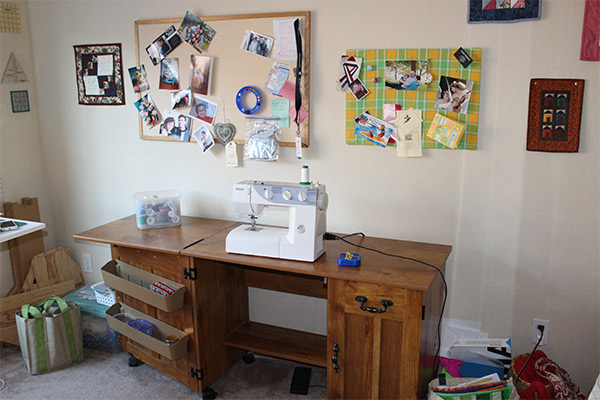
Paul bought me this sewing table ten years ago and I have loved it. Not too big not too small. The only thing I want to change here is thread and bobbin storage. That’s it right there to the left of the machine.
#4 Make A Plan
I’ve written a map of the room and what I want it to look like. I have also made a shopping list. My parents are going to be here this week and I want to take advantage of my step dad Roger. I’ve already warned him that there will be some shelves (among other things) to be built when he gets here.
I’ll let you know how it turns out.
Friday, September 6, 2013
Work on more than one project at a time.
My friend Regina taught me to work on more than one project at a time. She taught me that as it relates to knitting but it applies to any medium.
If you are like me you were raised to finish one project before starting another so it was a hard habit to break. It is true that is take a little longer to finish but I’m so much happier.
Sometimes I’m stuck. Sometimes I’m out of the fabric I need and don’t want to go to the store. Sometimes I’m just bored. Sometimes I need a break from a project even when it is something I love. I love being able to put away a quilt and have some knitting or a small quilt waiting for some attention.
I usually have a quilt or two in the works as well as a knitting project. Since I changed to this way of thinkingI get more done and am much more creative.
A few months back I was working on this hexagon quilt. Cutting all the triangles was very time consuming, which I was prepared for, but as I pieced it together it wasn’t working. The centers didn’t connect the way they were supposed to, the strips didn’t fit together correctly either. I was so frustrated!
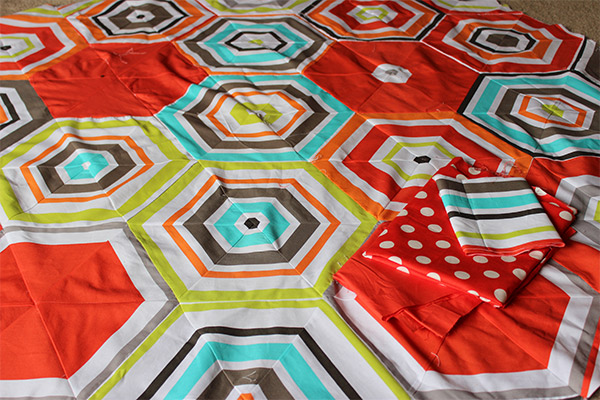
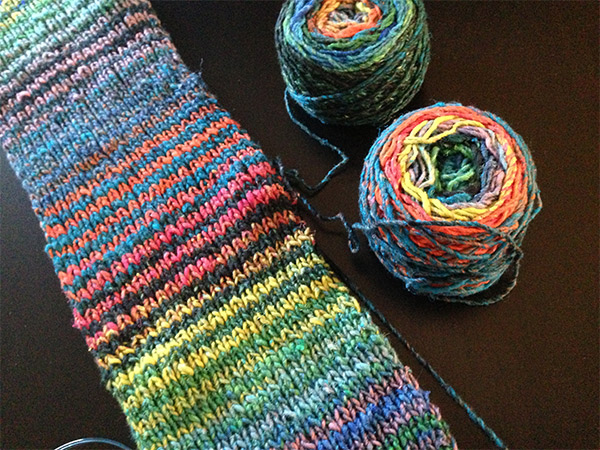
I couldn’t even look at it any more. I folded it up and sat down with this Noro scarf I’d been knitting. It was perfect to get the quilt out of my head for a while, until I could face ordering more fabric and starting again.
What about you? Do like to finish a project before you start a new one or are you a multi-tasker?
Tuesday, September 3, 2013
I’m am working on some fun projects right now.
I’m finishing up Lexy’s quilt. That’s her fabric up there and it is wonderful fabric to work with. This is one of the first designs I’ve made that is all my own and I’m really proud of it. I love how it is coming together, it is even better than I had planned. The quilt is for her baby and I have been daydreaming about how it is going to perfectly compliment her nursery. I can’t wait to share it with you.
I’m also starting on a quilt for Liz. She and my brother are expecting their second child in November.
Because of Labor Day the week is short and I need to finish my book for book club and I’m spending Wednesday with my friend Sue. If I do have extra time I will be working on finishing several quilts. The quilt tops are all done, it is just the quilting and binding that need to be completed. Some are personal and some are for friends.
Friday, August 30, 2013
It’s Okay to Stop in the Middle of a Project
There are many reasons why projects stall in the middle; boredom, a change in circumstances, perhaps the fabric/pattern is disappointing.
For me, the most discouraging thing I face when quilting is when I’m almost done with a quilt top and I discover I’ve made a mistake. A mistake that could easily have been bypassed had I been paying attention and that will require a lot of seam ripping and repeat work. I just hate that.
Sometimes, I just can not bring myself to take it apart and start over nor can I bring myself to move forward with a big mistake and I am paralyzed. I may or may not say a cuss word and then leave the whole thing in a pile on the floor next to my sewing machine and then I go look for some ice cream.
When I can finally bring myself to look at it again, without crying (or cussing), I gather it all up, put it in a plastic container or plastic gallon bag and stick it on a shelf.
I learned to put it away for a while and let myself move on to other projects. When I get it out, at a later date and I can see it with fresh eyes. I find that I can veer from from original plan or can face fixing any mistakes. The bottom line is that I am much more likely to finish it.
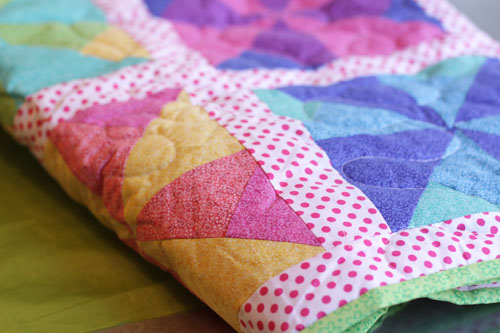
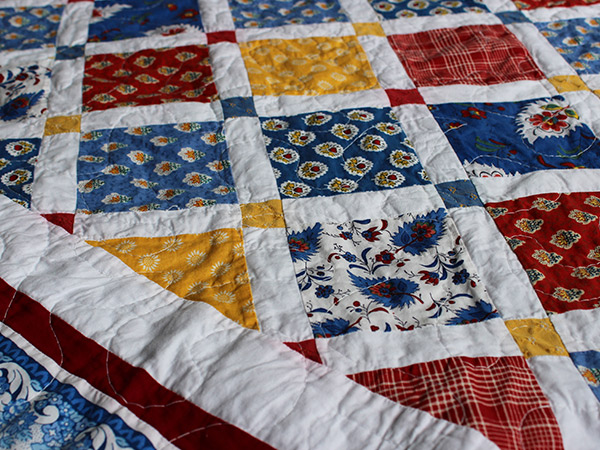
This is a quilt I made for my little niece. I bought the fabric, cut it, and sewed all the blocks but I just wouldn’t come together the way I had envisioned. I put it away. Two moves, nine years and a niece and nephew later, I pulled it out and looked at it again and could consider many possibilities that I just could see before. I took it apart, found complimentary fabrics, put the blocks together in a different way that I originally planned and now it is one of the quilts I’m most proud of.
So give yourself a break. Discipline has its place but creativity in any form, should feed your soul. It shouldn’t be drudgery and it should never make you feel guilty.
What about you? Do you have a trick that gets you motivated when you get stuck?
Wednesday, August 28, 2013

Monday, August 26, 2013
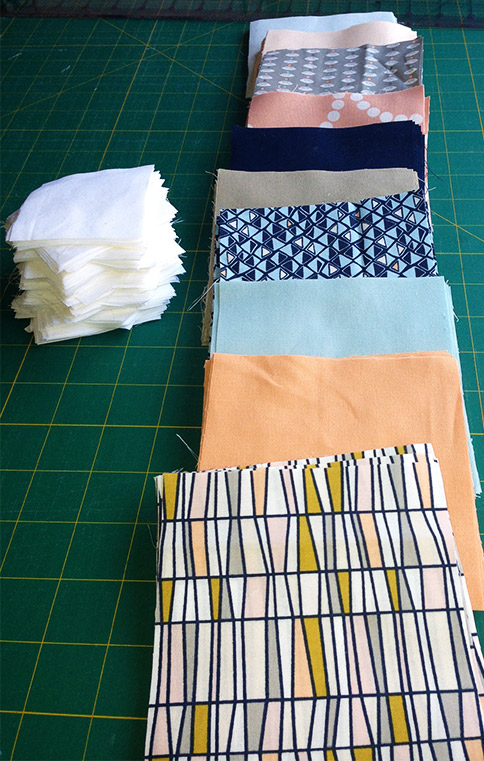
I’m making a couple of quilts for my sister Sara. She wanted me to use this clean, modern line of fabrics by Michael Miller. Although they aren’t colors I seek out normally, I love them! They have been fun to work with. The fabric is a little heavier than I normally use in a baby quilt,it is more like decorator fabric. It softened up beautifully when it was washed, however and if this is a well used quilt, it will be that much more durable.
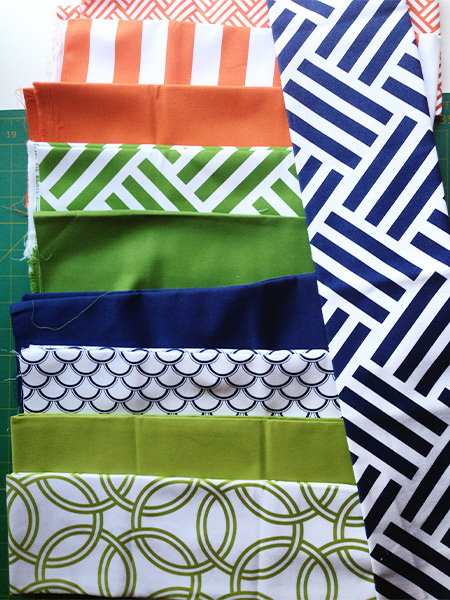
The patterns are large and I wanted to employ them in the best way possible. I started by planning it with this Six Squares pattern but we wanted to use four different colors and the six squares didn’t allow me to use all the fabrics. So then I designed another quilt using more and smaller squares, using this and this as my inspiration, but no matter how I worked the design the squares were just too small. So back to the drawing board, literally. I went back to the Six Squares design and reworked it with eight squares. It was just right.
I actually ended up making this quilt three times. I made it in a lap size so I could work out all the bugs. Then I made it in a baby size but didn’t notice the mistake with the orange square until it was already quilted and bound and I was taking pictures of it. Ugh!!
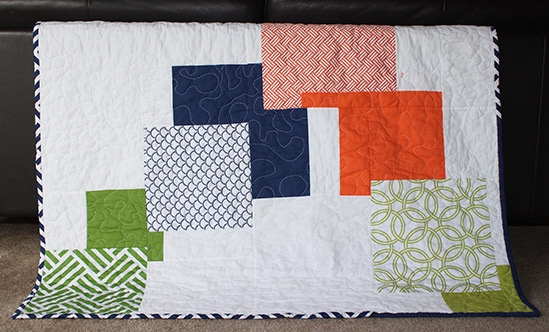
I don’t understand it. I looked at that quilt top for hours while I bound it. I went over it every inch of it cutting all the tiny threads. I held it up in a mirror after each block was sewn. I guess I stopped looking at the design as a whole and just focused on the smaller pieces, until it was too late.
Luckily I cut out two of everything so that I could make a second quilt and Voilà! Here is the finished product.
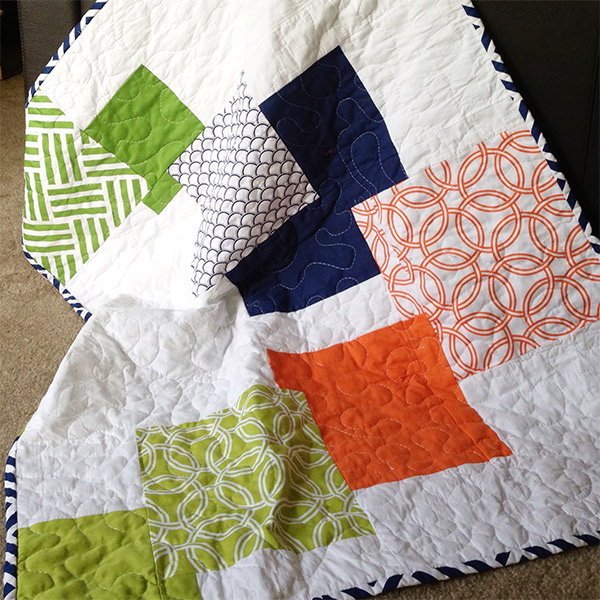
I’m really proud of it and can’t wait to mail it off.
What I learned?
Look at the pattern as a whole and not just the smaller pieces.
Friday, August 16, 2013

So, last Monday I sent off the first official quilt from Yellow Bug Quilts. It was the one I talked about in the last couple of posts. I forgot to take a picture (ugh!) but it made me happy. Hopefully, Jean will send me a pic when it is up on her wall.
A couple of things I learned from making that quilt:
If something goes wrong, don’t contact the customer (even if it is someone close to you) until you are emotionally under control. I wrote to Jean asking her what she wanted me to do, remake the quilt or just send the one that had bled. That was stupid. At the time I was still in shock that the quilt was ruined and could not face the idea that I was going to have to start over. I wasn’t thinking. Of course I needed to make a new one! I should never have put that on her shoulders. If I had waited one more day to contact her I would never have asked her anything. I would have just been contacting her to tell her I was remaking the blanket.
I have four more quilts in the works but between the first week of school, kids coming home from their summer Europe trip and getting them off to to school in Utah again, the quilting has come to a stand still. Hopefully I can get going again next week.
Tuesday, August 13, 2013

Consider keeping a creative journal.
You could include:
This is also a good place to critique yourself. Describe anything you don’t like or might do differently next time.
This takes a little discipline at first but, I promise you will be delighted when you have a record of your work and it is so satisfying to see your progress throughout the years.
Do you keep a journal? Would you add anything to this list?
Thursday, August 8, 2013
I washed Jean’s quilt to to get it ready to send. Washing makes it a little puffier and tightens the quilting a bit. I pulled it out of the dryer and was horrified to see that the little red squares bled! Nooooooooooooo! I was just sick! After I stopped hyperventilating, it still took me 24 hours to come to grips with the fact that I was going to have to start again.
I don’t think you can see it very well in the pictures. It is much more noticeable to the naked eye.
I hadn’t checked the color fastness and now I am paying a hefty price. I started over yesterday and will finish today or tomorrow.
It isn’t all bad. I had quite a few squares already cut and I already have the piecing process down. I am going to tweak the quilt a little too. A solid blue for the binding and a couple other little things that only I would notice. Also, my shipping boxes just arrived and I wouldn’t have had those to use, so that that is a good thing as well.
Have to look for that silver lining, right?