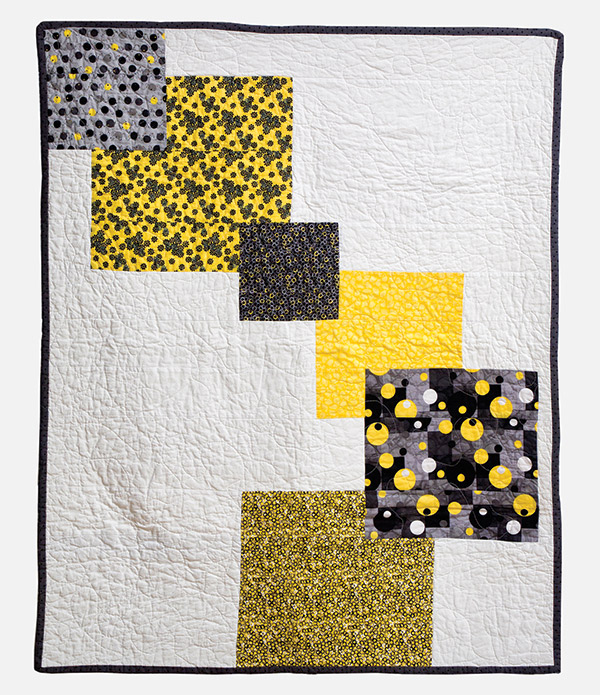
I loved making this quilt! Because the pieces are large, cutting and piecing them was simple and fast.
For some reason I though it was going to be a lot more complicated but it was simple. I also enjoyed working with these colors. I love the dramatic effect of yellow and black but I rarely choose to work with that combination.
This quilt is approximately 50″x 62″ when it is finished and it took me 2 days. Day 1- cut and piece the top and back Day 2- quilt and bind
Fabric you will need:
7 coordinating fabrics, 1/2 yard each. One for each square and one for the binding.
1 background color, (mine is in white) 2 yards
1 color for the back, 2 yards (You may use a fabric from one of the squares or another coordinating or contrasting fabric.
Batting, at least 55″x 70″ inches
Let’s get started.
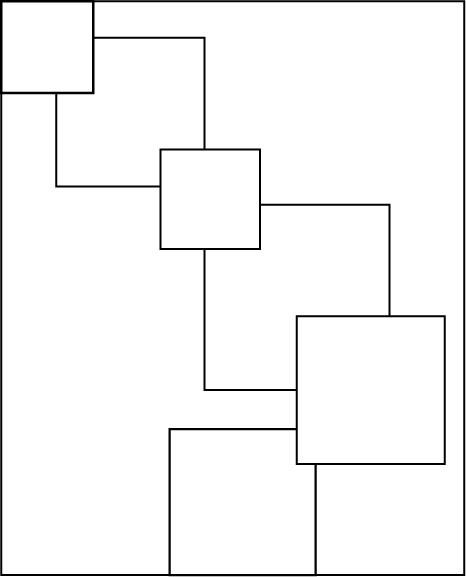
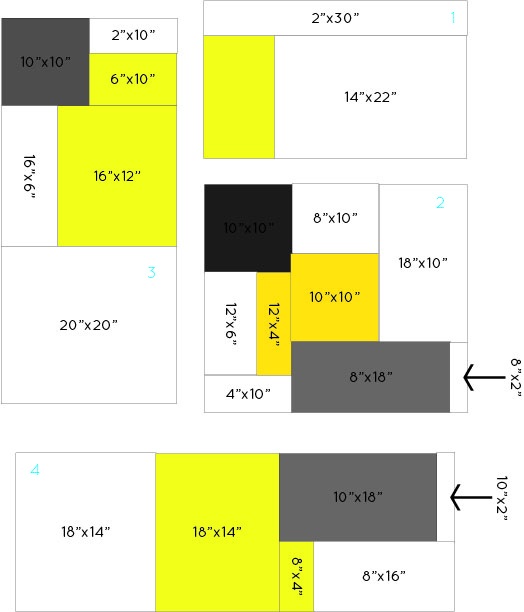
Begin by deciding which fabrics will belong to which square and mark your pattern accordingly.
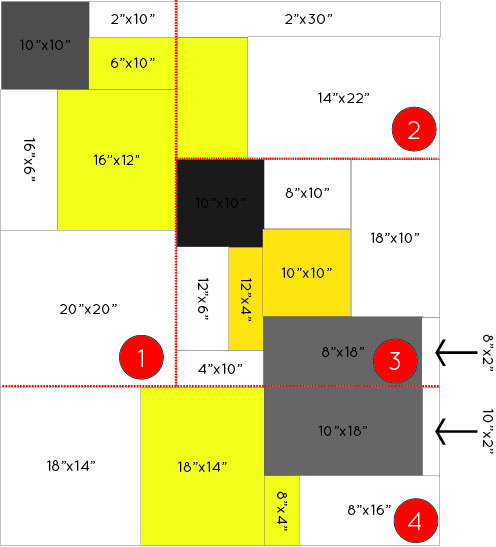
Now start cutting your fabric using the measurements below.
As you cut each piece do two things.
- Write the measurements on the back of each piece of cut fabric as you cut.
- Separate your cut pieces into one of 4 piles, one for each section of the quilt. These two things will save you a huge headache when you start piecing.
Tip: Cut all of the pieces of each color at once.
Is everything cut? If no, keep cutting. If yes continue.
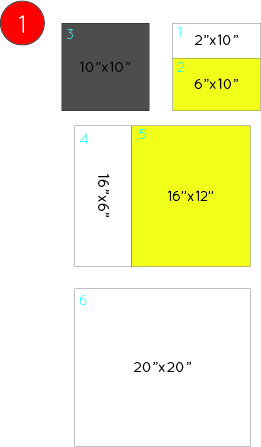
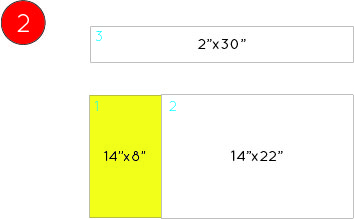
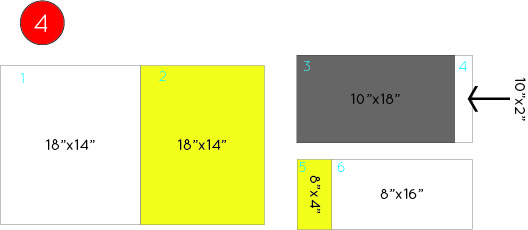
Now your going to sew each section. The pieces in each section has a blue number, to show the order in which I sewed them together. If you see a way that makes more sense to you, do it. Then, without delay, send me a note telling me how you did it.
Sew each section.

Next, your going to sew the sections together.
Square up the edges and your done with your quilt top!
Make your quilt sandwich and baste.
Quilt your quilt, I used a meandering free motion stitch (as usual).
Bind your quilt
Send me a picture of your finished quilt. I’d love to see how you made it your own plus I can steal your ideas while I’m at it. 🙂