Happy Trapezoid Pattern

happy-trap-folded

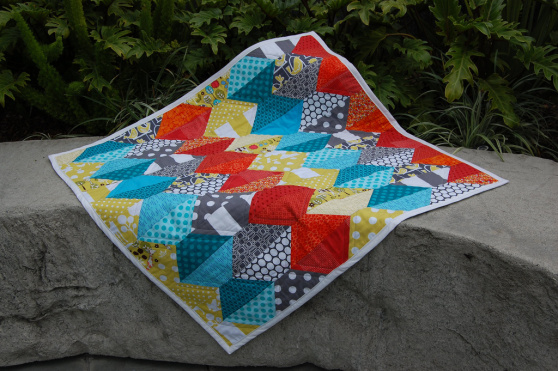
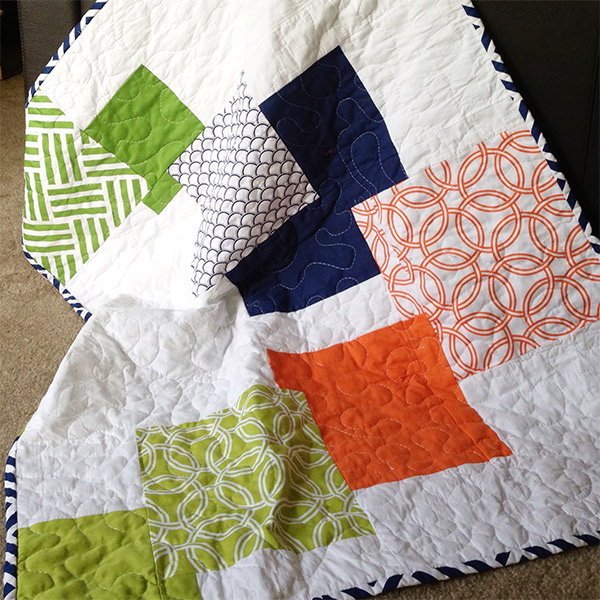
This quilt is 38″ x 50″ and took me approximately 15 hours to make from start to finish.  I did it over 3 days, which is how create most of my quilts.  

Day one, I cut and arrange.

Day two, I piece the top and baste the quilt sandwich.

Day three, I quilt and bind the quilt.

Tools you will need:

  • Circular cutter
  • Cutting mat
  • Cutting ruler with a 20° mark or a template
  • Pins
  • Seam ripper
  • Iron

Materials you will need:

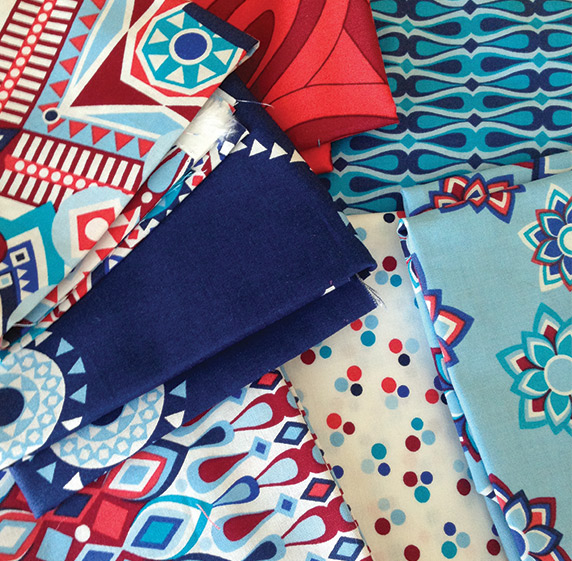
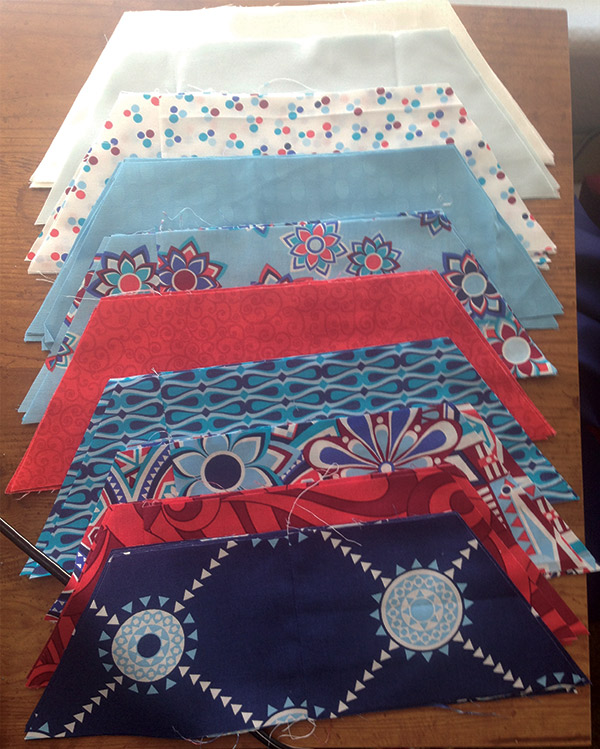
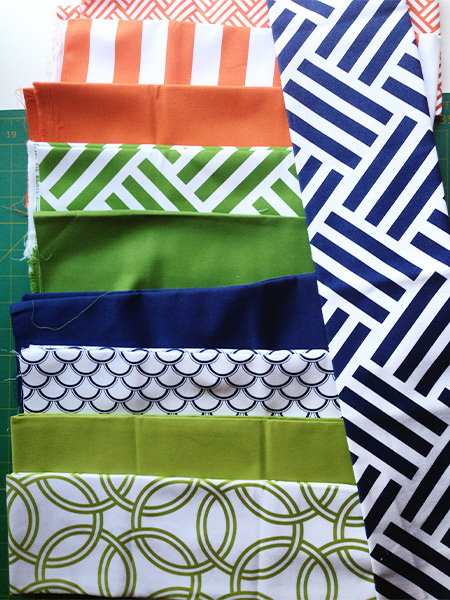
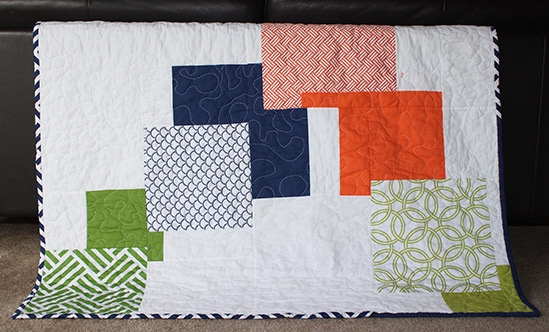
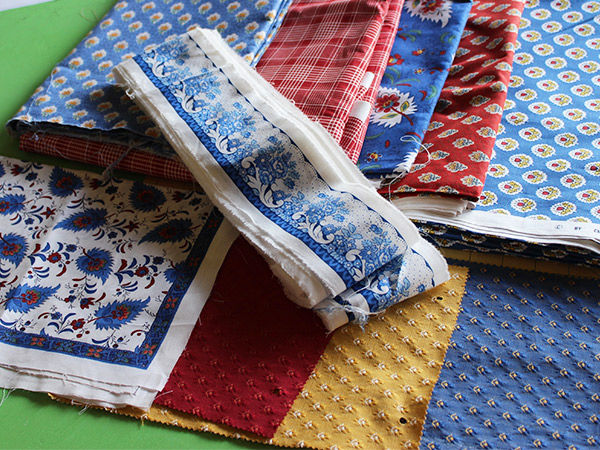
  • 10-14 different fabrics, 1/2 yard each    When choosing your fabrics you will want even numbers of prints and solids as well as even numbers of dark and light.
  • Fabric for the back, 2 yards
  • Fabric for the binding, 1/2 yard
  • Batting

Directions: 

Begin by cutting your fabric into trapezoids.

I start by cutting 4.5″ strips and then sewing them together to make one long strip.  The length will depend on how you many colors you use.  Each trapezoid will be 13.5″ long.  Knowing that, if you need three trapezoids of that color, the length will be about 40″ long.

happy trap 11

Then using the 20° mark on my ruler, I cut a 20° angle creating the first edge of the first trapezoid.

happy trap 13


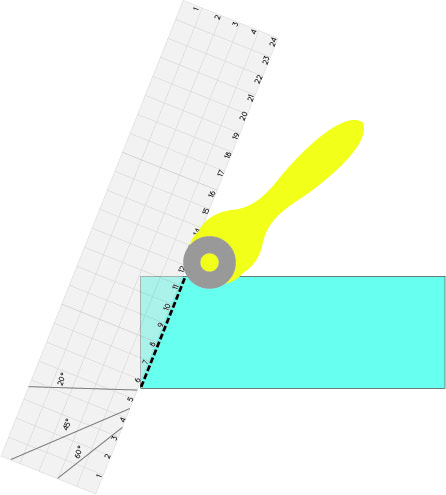
Then I measure and mark 8.5″ and 13.5″, line up the marks and made another cut.

happy trap 12

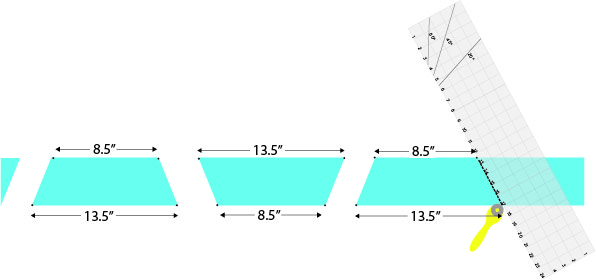
You may find an easier way to do this step.  If you do, you are bound by Quilter’s Law to share it with me.  🙂

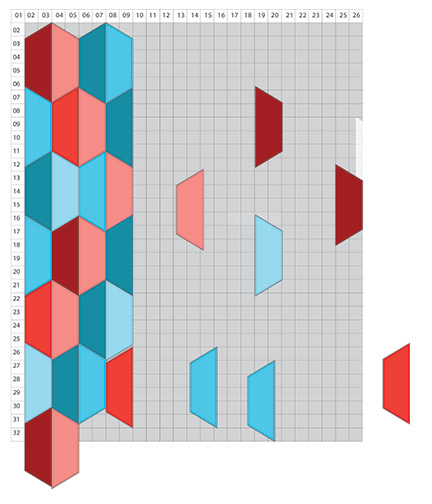
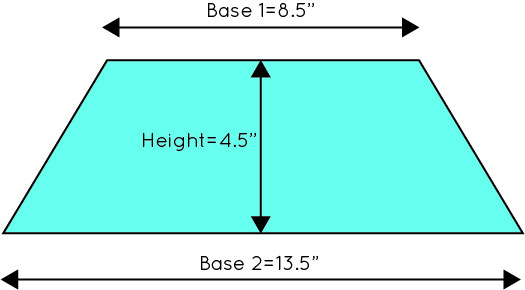
You will need to cut a total of 50 trapezoids.  Base 1= 8.5″   Base 2=13.5″   Height =4.5″

happy trap 2

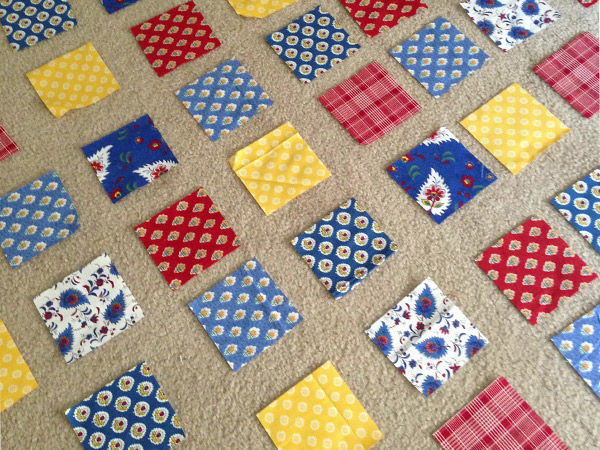
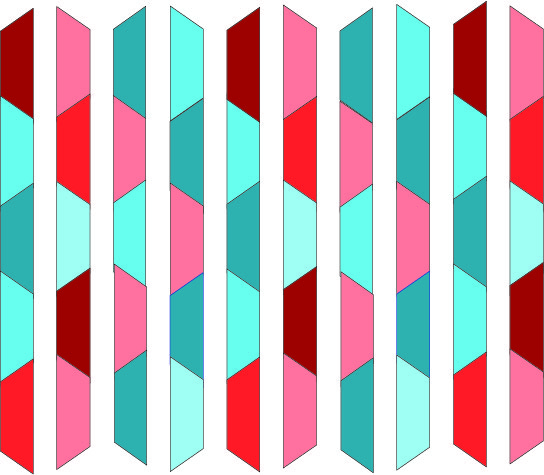
When all your fabric is cut, begin arranging.  Five down and ten across.

Tip:  If the arraignment isn’t what you imagined, don’t be afraid to change things up.  It is hard for me to switch gears when things don’t work out as planned, so I’m saying this mostly to myself.

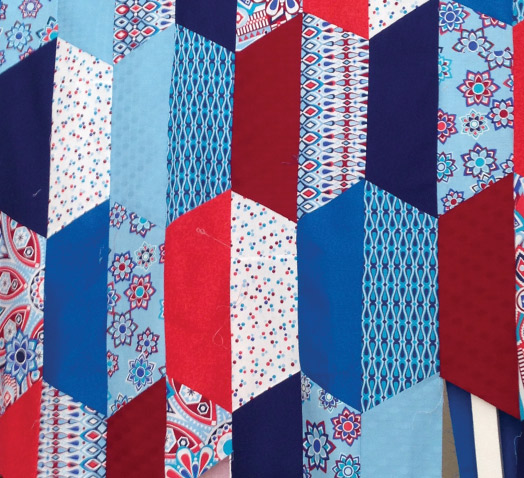
With this quilt, I planned on doing red solids with red prints and blue solids with blue prints but I ended up with a solid-print-solid-print sequence.  Play with it until it looks good to you.

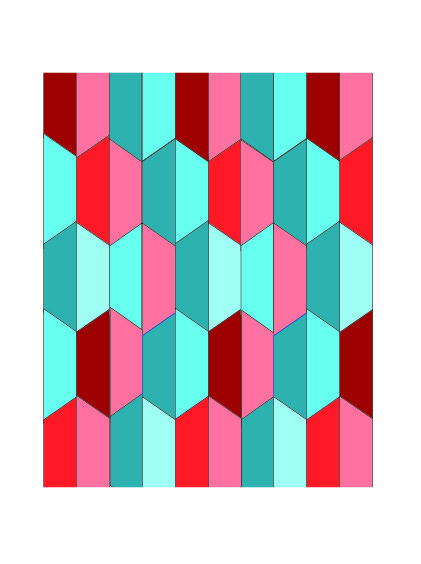
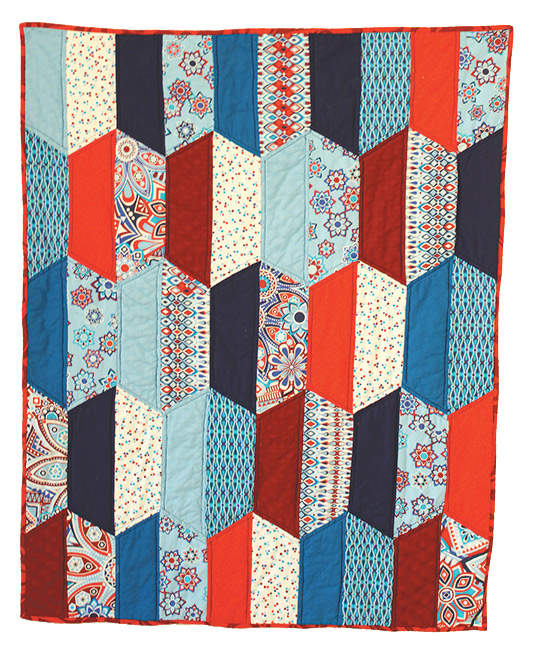
This is what I ended up with and I love it.

jm-arraingment

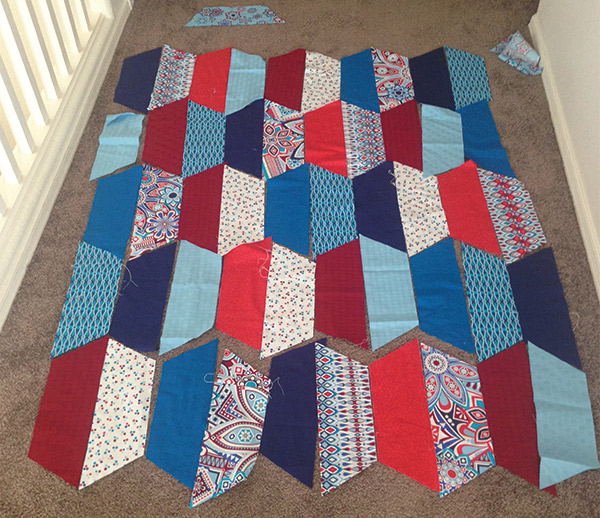
*Tip: Take a picture of your arraignment so you have a reference if you need it.

Begin piecing each column.  There should be five trapezoids in each column.happy trap 6

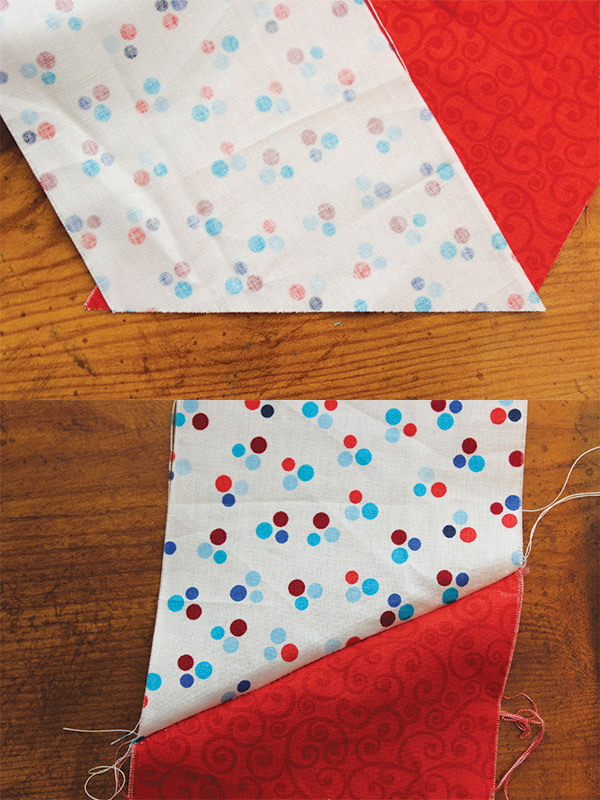
Piecing angles can be tricky at first.  If you line up your corners and then sew it together, (as shown below) your edges won’t line up.  Booooooo!

angle-pin-no

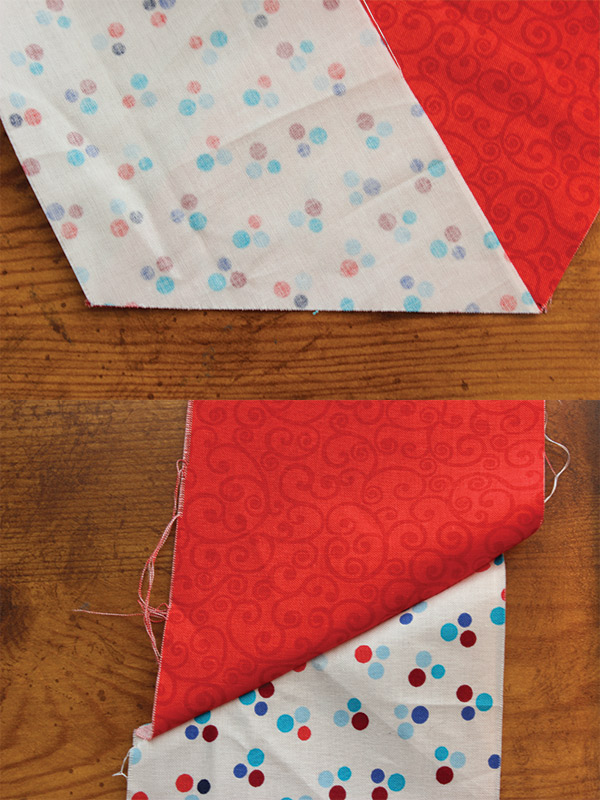
You will need to stagger the corners using the 1/4″ scant seam allowance (as shown below) then your edges will look like this.  Yea!!!

angle-yes

I pin my first five or six pieces to make sure I’m right on but after sewing a few I can usually eyeball it.  

Double check the edges after each seam is sewn, to make sure everything is lined up correctly.

Remember to press each seam as you sew.

Repeat until all ten columns are sewn.


happy trap 7

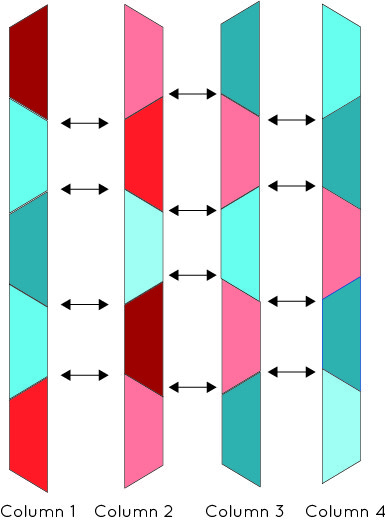
Now we’re going to start sewing the columns together.  Pin column one to column two, where each of the seams meet and sew.

happy trap 10

Confession: Normally, I go to great lengths not to pin.  This is one instance, however, that lots of pinning is worth my time.  Pinning will make sure all your seams meet together.

Continue to pin and sew each column until all 10 columns are sewn together.

happy trap 4


happy trap 5

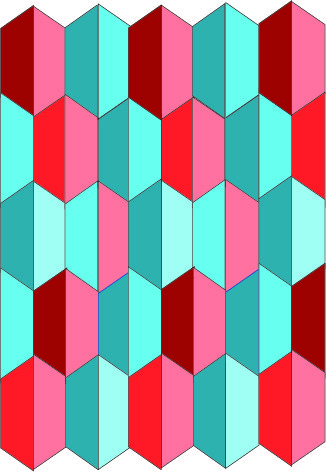
Press all your seems one more time.  This will help to make sure the edges of your quilt are nice and straight.

Square up the edges by cutting off the extra fabric.

happy trap 9Your top is done!

Next, make your quilt sandwich.

Quilt Sandwich

Baste your quilt.

Quilt your quilt.

I quilted along the angles to make this chevron design.

happy trap quilt 1
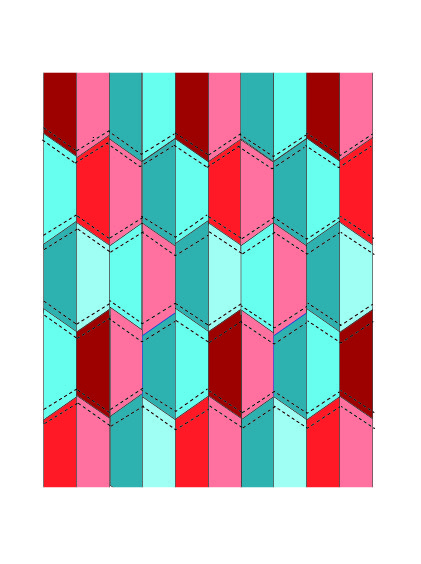
I felt like it needed a little more quilting so I went back and quilted the inside of every other trapezoid.  In this case it ended up being all the solid trapezoids.     happy trap quilt 2

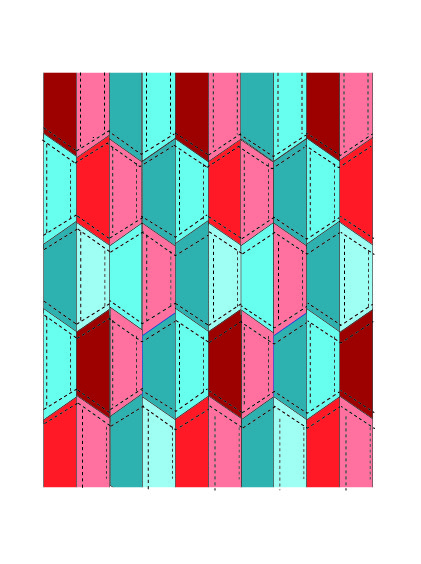
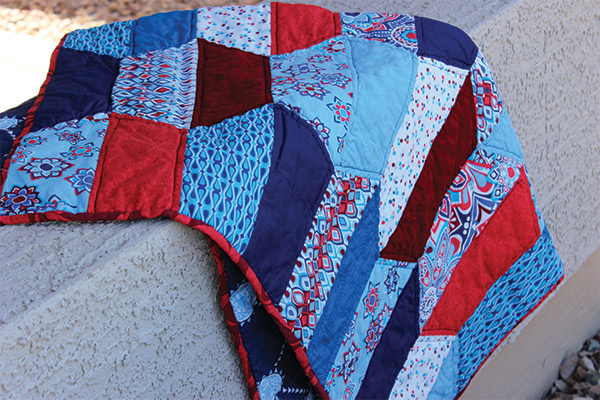
I love how it looks.

happy-trap


Bind your quilt.  There are many ways to bind a quilt.  If you are new to quilting there are a zillion tutorials out there.  I think Allison at Cluck Cluck Sew has a great tutorial for machine binding.  

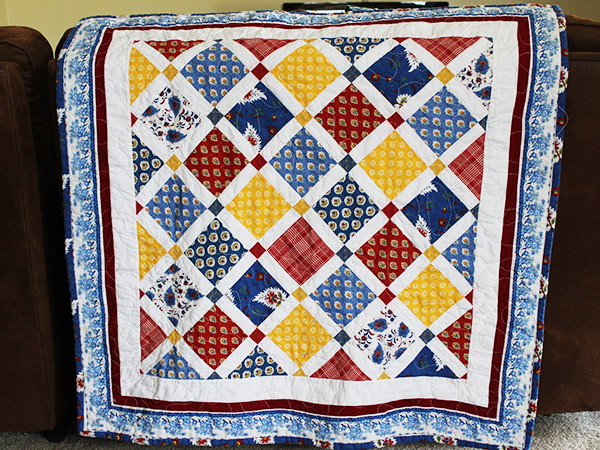
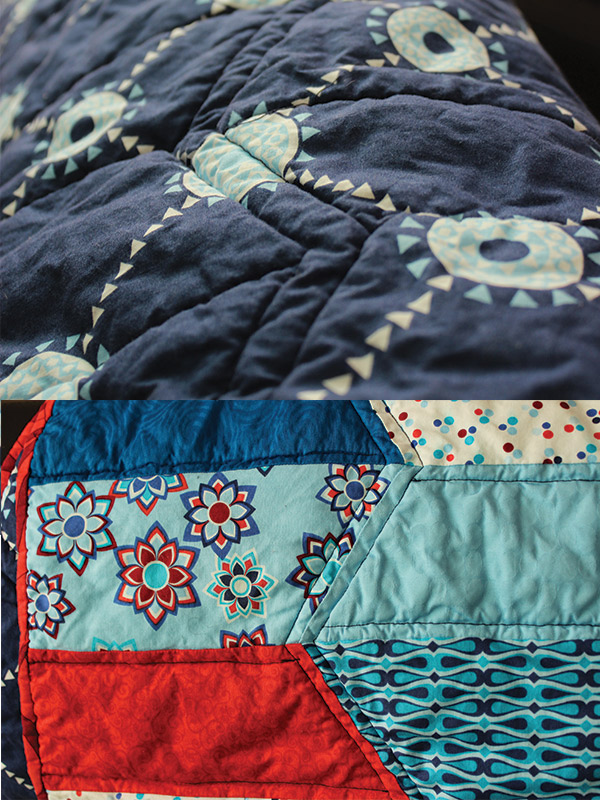
You’re done!  This is mine.

Happy-Trap-gallery

I’d love to see your finished quilts!  Please send any pictures you’d like to share to [email protected].

Happy Trapezoid

jenean-morison

The  super talented Jenean Morrison sent me this gorgeous fabric last spring.  Jenean designs fabrics among many other things.  All her creations are fresh and bright and playful and I love all of it!  Click through to see her 2014 summer line call Lovelorn.  I can’t wait until next month when I can order some!

This line of fabric she sent me is called Beachwood Park and it is interesting because it uses reds, whites and blues but really isn’t patriotic.  Jenean used several different hues of reds and blues and patterns that take my mind places other than the 4th of July.

This quilt from MQG inspired the the pattern and quilt I made for Jenean’s Fabrics.

trapizoid inspiration

When I saw it I knew is was perfect for what I had in mind.

I sat down and planned the quilt.  Here is my first draft.

Untitled-1Once I had my plan Sue and I headed to the fabric store and bought some matching solids.  I’m terrible at matching colors so I love having an extra pair of eyes with me, plus Sue is just one of my favorite people.  Win-win!

Here they are all cut into pretty trapezoids.  (I need to clean my iPhone camera)

Hap-trap-cut

I cut out all the trapezoids and then set to work arranging them.  I think I spent more time arranging and rearranging them than I did anything else but this is what I ended up with.

jm-arraingment

Once I had everything in place, I started piecing.  I was really happy with how the top turned out.

pretty-corners

For the quilting, I followed the lines of the angles and ended up with this chevron pattern.

happy-trap

To add a little more quilting, I quilted around each of the solid trapezoids.

For the backing I used one of the larger patterns in this line called Reunion Blue and bound it in Rendezvous Red.

reunion-blue

I couldn’t be happier with it.  What do you think?

happy-trap-2


Sara’s quilt

I’m making a couple of quilts for my sister Sara.  She wanted me to use this clean, modern line of fabrics by Michael Miller.  Although they aren’t colors I seek out normally, I love them!  They have been fun to work with. The fabric is a little heavier than I normally use in a baby quilt,it is more like decorator fabric. It softened up beautifully when it was washed, however and if this is a well used quilt, it will be that much more durable.


mm-fabric-bekko


The patterns are large and I wanted to employ them in the best way possible.  I started by planning it with this Six Squares pattern but we wanted to use four different colors and the six squares didn’t allow me to use all the fabrics. So then I designed another quilt using more and smaller squares, using this and this as my inspiration, but no matter how I worked the design the squares were just too small.  So back to the drawing board, literally.  I went back to the Six Squares design and reworked it with eight squares.  It was just right.

I actually ended up making this quilt three times.  I made it in a lap size so I could work out all the bugs.  Then I made it in a baby size but didn’t notice the mistake with the orange square until it was already quilted and bound and I was taking pictures of it.  Ugh!!

sara's-quilt-mistake


I don’t understand it.  I looked at that quilt top for hours while I bound it.  I went over it every inch of it cutting all the tiny threads.  I held it up in a mirror after each block was sewn.  I guess I stopped looking at the design as a whole and just focused on the smaller pieces, until it was too late.

Luckily I cut out two of everything so that I could make a second quilt and Voilà!  Here is the finished product.

sara's-quilt


I’m really proud of it and can’t wait to mail it off.

What I learned?
Look at the pattern as a whole and not just the smaller pieces.

Jean’s Quilt

My sweet friend Jean went to the south of France in June and brought back these wonderful fabrics.  She sent them to me to make a ‘Country French’ quilt for her wall.

The fabrics are beautiful and I couldn’t wait to get started.  As I studied them and planned how they would go together, I decided that they needed a little more yellow.

Demery


I casually started looking for Charles Demery fabrics to order online and was surprised to hit brick walls every where I looked.  I tried everything I could think of, eBay, etsy, little stores that sell French products.  I wrote several emails and made phone calls.  A few places sold Charles Demery fabrics but not the color or pattern I needed.

In my effort to find the fabrics I ended up doing a lot of reading and now I feel like a Charles Demery expert.  He was a French fabric designer in 1916.  As of the mid 1970’s Demery’s company was run by his nephew.  His nephew oversaw the switch from hand printed fabrics to machine printed fabrics.  His patterns are copied reproduced occasionally by present-day designers.  Click here to read more.

When Jean sent the fabrics, I knew they were special because they were purchased at a market in France.   It didn’t take long for me to learn that working with these fabrics was a rare treat.

In the end I wasn’t going to get any more of this fabric unless I went to France myself.  I ended up going to a local quilt store where I bought the fabric below.  It works well with the other fabrics and add that  yellow I wanted.

Here the squares as I was just beginning to arrange them.

Demery-squares


And here it is all done!

demery-quilt


I put a sleeve in the back so Jean can hang it.  Designers print their names and pattern line on the selvage edge of their fabrics; I incorporated the selvage edge into the sleeve so Jean would have it as a record.


Demery-selvage


As part of her payment she is letting my keep the rest of the fabric!  What do you think I should I make?

Two Large Pieces of Fabric . . .


What I like most about quilts is their simplicity. The designs of the quilt top may not be alike and the fabrics may differ in weave and make up. Every quilt however, no matter how big it is, how old it is, whether it was pieced by hand or machine is same it its basic construction. It is two large pieces of fabric with cushioning in between to help capture heat, sewn together to make a useful household item.

I used to say that quilting was easy because the construction and the patterns I worked with were easy for me to understand and to learn. Then I found that was hurting feelings. In my mind I was saying, “If I can learn this anyone can learn it, let me show you.” (Good) What people were hearing however was, “I’m so talented and churn these things out without even trying.” (Bad)

So I rethought what I was trying to say and realized that simple, was the word I wanted.

Saying it is simple is not to say it is easy. We’ve all seen quilts like this one with a zillion tiny pieces carefully planned and sewn together to make an exquisite piece of art.

Karen Brimhall

photo by Karen Brimhall via flickr

Kaffe Fassett’s quilts always makes my heart skip a beat. His brilliant use of both colorful fabrics and imaginative patterns to create quilts like the one above, is unparalleled.

At its core however, it is still two large pieces of fabric with cushioning in between to help capture heat, sewn together to make a useful household item.