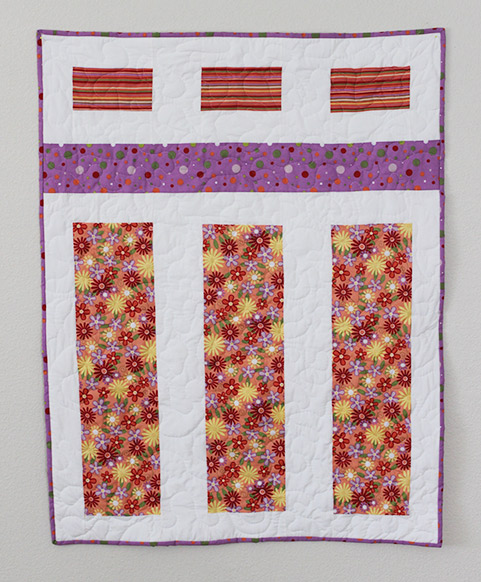
Over at Pincushion, I wrote about a wonderfully inspiring trip I took to Palm Springs a few months ago. This quilt is my first to be born of that inspiration.
I’ve had this happy fabric in my stash for a few years now and was finally able to put it to good use. I really like how it turned out although, I think if I make it again, I will use squares at the top. I don’t think the rectangles are quite generous enough.
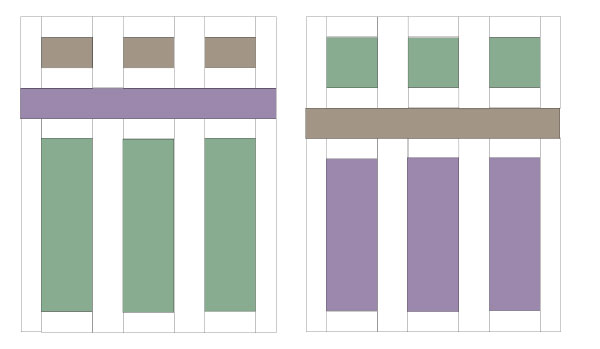
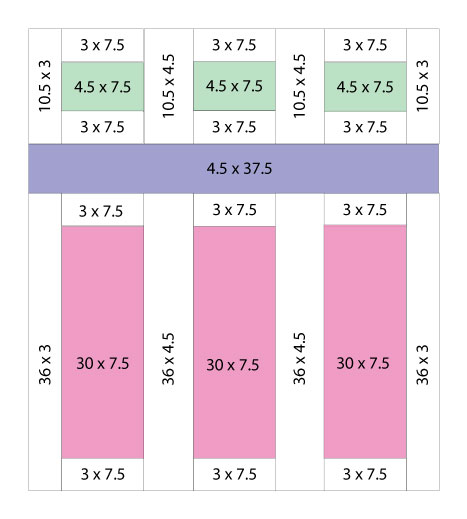
Below is the pattern I wrote for the one with the rectangles. I will remake it using the squares and post that in a week or two.
This finished quilt measures approximately 37″ x 51″ and makes a generous baby quilt. It took me about 5 hours from start to finish. This is one you could definitely finish in one day. (These instructions assume the reader knows how to quilt and bind.)
Let’s get started.
You will need three different colors of fabric plus a background fabric, back and binding, for this quilt.
Using the measurements below, (I added the quarter inch scant to these written measurements) cut your fabric pieces. Remember to add 1/4 inch seam allowance.
Color 1:
- 3 rectangles 4″ x 7.5″
Color 2:
- 1 rectangle 4.5″ x 37.5″
Color 3:
- 3 rectangles 30″ x 7.5″
Background:
- 12 pieces 3″ x 7.5″
- 2 pieces 36″ x 3.5″
- 2 pieces 36″ x 4.5″
- 2 pieces 10″ x 3″
- 2 pieces 10″ x 4.5
Your back should be about 40″ x 55″.
Your binding should be about 190″ long.
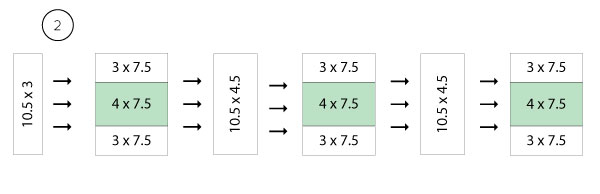
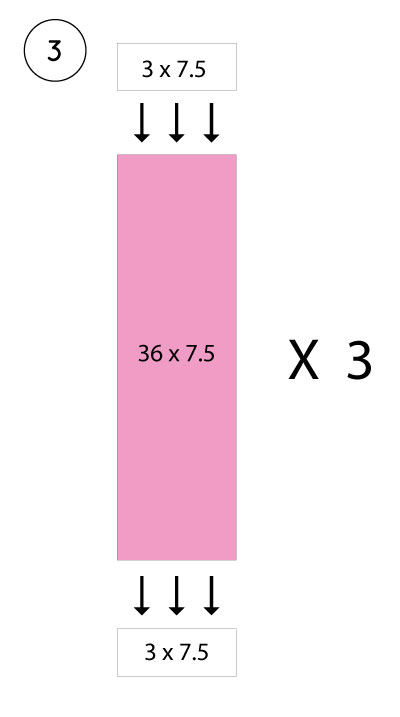
Once you have your pieces cut, you are ready to piece your quilt top.


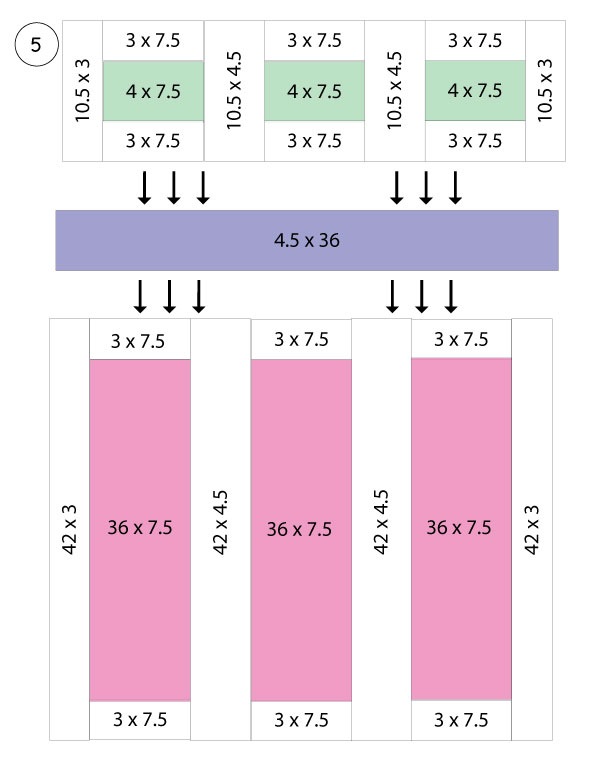 Woohoo! You’re done!
Now make your quilt sandwich, baste, quilt and bind. Please share your finished quilt with me. Send your pic to [email protected]. I love seeing what you’ve done and how you’ve made it your own!