Front Doors, Hot Dogs and Inspiration

You know that cartoon with two people are stuck on a deserted island and they are really hungry?  Then one of them looks at the other and all he can see is a big hot dog?  Well, I felt like during my first visit to Palm Springs a few years ago.

mid mod garage
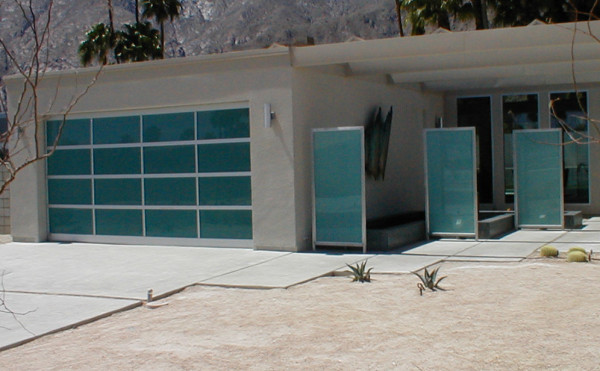
photo by glassgaragedoors.com

I knew it would be fun to visit with friends, eat good food and do a little site-seeing but I had no idea that the town would be so visually appealing.  I didn’t know that much about Palm Springs and I’m not sure what I expected exactly, but I didn’t expect it to be so handsome.  The homes, the signage, the walls, the accents, colors, mail boxes, everything was classic Mid-Century Modern design and I couldn’t get enough.

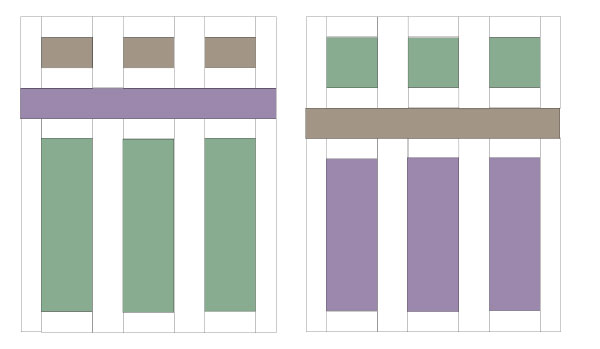
Because of the clean lines, bold shapes and simplicity of Mid-Century Modern, it easily lends itself to quilting.

As we drove around, everything I saw became another quilt in my head; I particularly loved the doors, like the one above.  My brain was on overload with ideas and when I got home, I sketched 30+ quilt designs in my notebook.  I have been dying to get started on some of them.

I’m afraid none of the pics I took are useable but I looked around and found a great post written by Mackenzie Horan, that highlights what I am talking about.

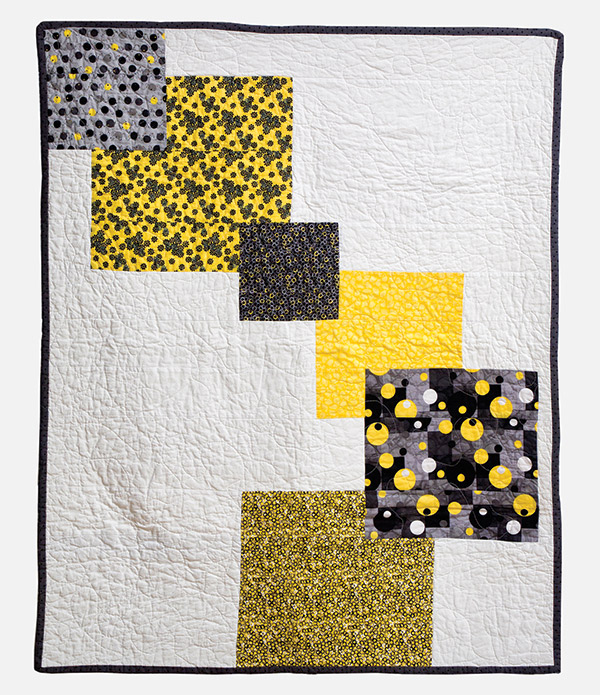
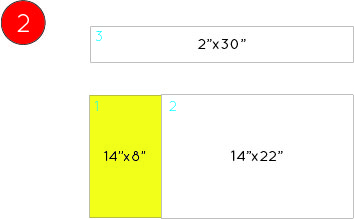
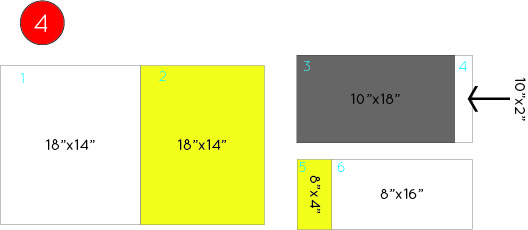
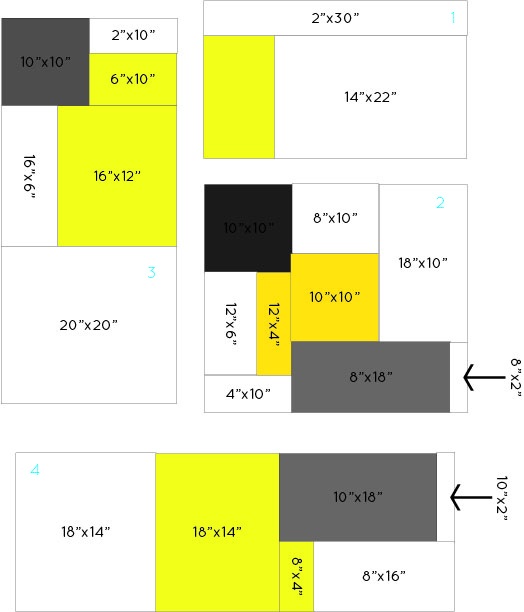
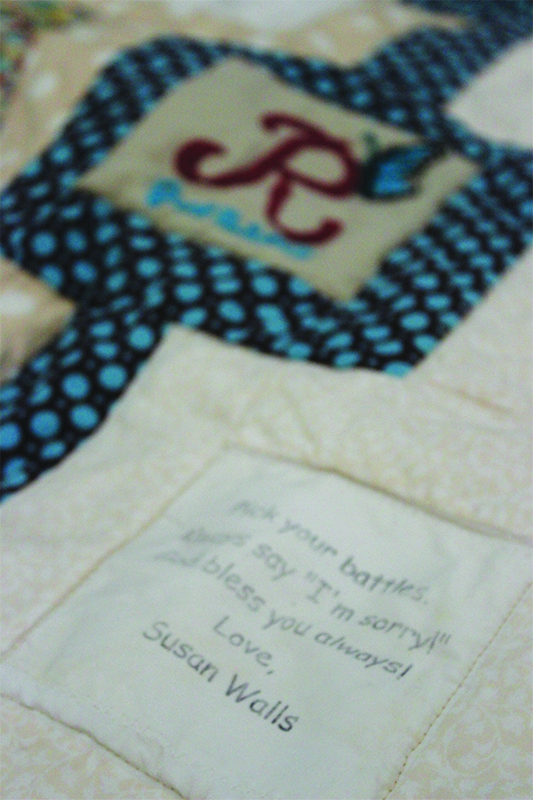
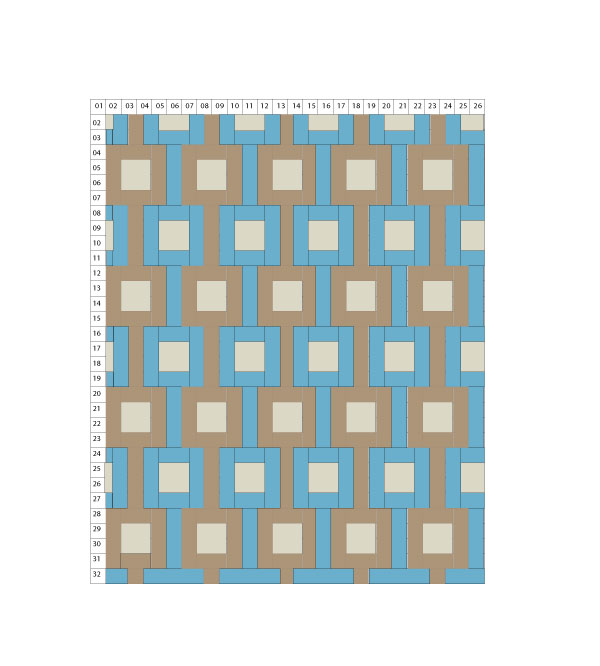
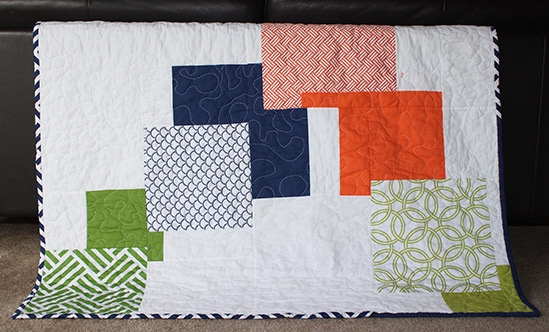
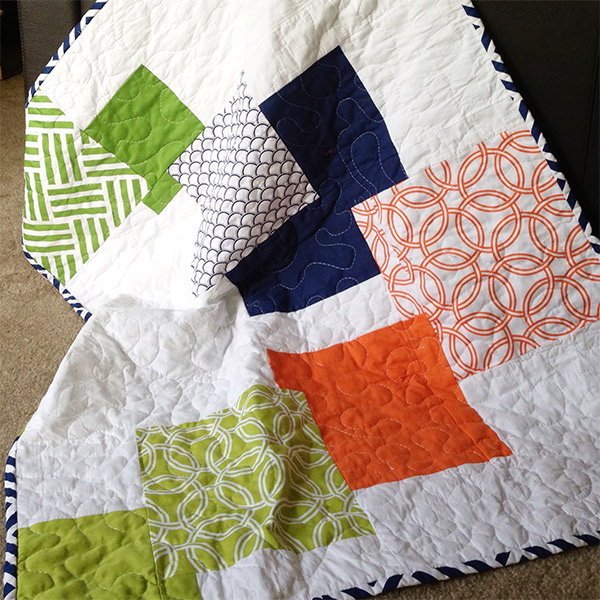
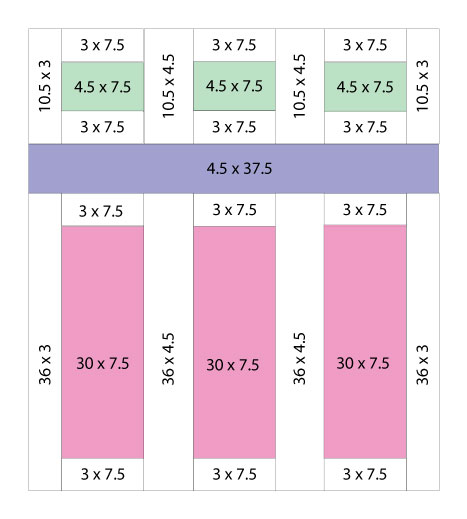
This is my first Palm Springs inspired quilt in a series I’m calling “Mid-Mod”.

mid-mod-1

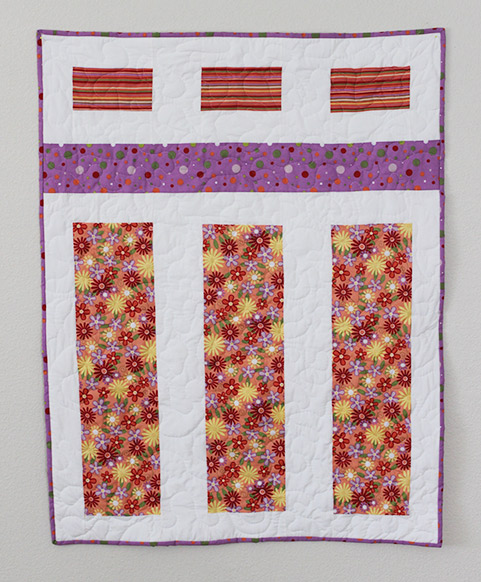
What do you think? I’m happy with it although, I think if I make this one again, I will use squares for the shapes at the top.  The rectangles don’t look generous enough to me.

I’d love to hear where you find inspiration? Nature? Blogs? Fabric Stores?  Are shapes or colors what inspire you or certain fabrics or designers?

Mid-Mod 1

mid-mod-1

Over at Pincushion,  I wrote about a wonderfully inspiring trip I took to Palm Springs a few months ago.  This quilt is my first to be born of that inspiration.

I’ve had this happy fabric in my stash for a few years now and was finally able to put it to good use.  I really like how it turned out although, I think if I make it again, I will use squares at the top.  I don’t think the rectangles are quite generous enough.

mid-mod-1-side-by-side

Below is the pattern I wrote for the one with the rectangles.  I will remake it using the squares and post that in a week or two.

This finished quilt measures approximately 37″ x 51″ and makes a generous baby quilt.  It took me about 5 hours from start to finish.  This is one you could definitely finish in one day.  (These instructions assume the reader knows how to quilt and bind.)

mid-mod-1-rec-measurements-1.5

Let’s get started.

You will need three different colors of fabric plus a background fabric, back and binding, for this quilt.

Using the measurements below, (I added the quarter inch scant to these written measurements) cut your fabric pieces.  Remember to add 1/4 inch seam allowance.

Color 1:

  • 3 rectangles 4″ x 7.5″

Color 2:

  • 1 rectangle 4.5″ x 37.5″

Color 3:

  • 3 rectangles 30″ x 7.5″

Background:

  • 12 pieces 3″ x 7.5″
  • 2 pieces 36″ x 3.5″
  • 2 pieces 36″ x 4.5″
  • 2 pieces 10″ x 3″
  • 2 pieces 10″ x 4.5

Your back should be about 40″ x 55″.

Your binding should be about 190″ long.

Once you have your pieces cut, you are ready to piece your quilt top.

mid-mod-1-rec-step-1mid-mod-1-rec-step-2


mid-mod-1-rec-step-3


mid-mod-1-rec-step-4


mid-mod-1-rec-step-5Woohoo!  You’re done!

Now make your quilt sandwich, baste, quilt and bind.  Please share your finished quilt with me.  Send your pic to [email protected].  I love seeing what you’ve done and how you’ve made it your own!

Six Squares

six-square-web

I loved making this quilt!  Because the pieces are large, cutting and piecing them was simple and fast.

For some reason I though it was going to be a lot more complicated but it was simple.  I also enjoyed working with these colors.  I love the dramatic effect of yellow and black but I rarely choose to work with that combination.

This quilt is approximately 50″x 62″ when it is finished and it took me 2 days.  Day 1- cut and piece the top and back  Day 2- quilt and bind

Fabric you will need:

7 coordinating fabrics, 1/2 yard each. One for each square and one for the binding.

1 background color, (mine is in white) 2 yards

1 color for the back, 2 yards (You may use a fabric from one of the squares or another coordinating or contrasting fabric.

Batting, at least 55″x 70″ inches


Let’s get started.

Begin by deciding which fabrics will belong to which square and mark your pattern accordingly.

six squares blank

Now start cutting  your fabric using the measurements below.

As you cut each piece do two things.

  1. Write the measurements on the back of each piece of cut fabric as you cut.
  2. Separate your cut pieces into one of 4 piles, one for each section of the quilt.  These two things will save you a huge headache when you start piecing.

Tip: Cut all of the pieces of each color at once.

six squares measurements


Is everything cut?  If no, keep cutting.  If yes continue.

Now your going to sew each section.  The pieces in each section has a blue number, to show the order in which I sewed them together.  If you see a way that makes more sense to you, do it.  Then, without delay, send me a note telling me how you did it.

Sew each section.

six squares section 1


six squares section


six squares section 3

six squares section 4

Next, your going to sew the sections together.

six squares construction


Square up the edges and your done with your quilt top!

Make your quilt sandwich and baste.

Quilt your quilt, I used a meandering free motion stitch (as usual).

Bind your quilt

Send me a picture of your finished quilt.  I’d love to see how you made it your own plus I can steal your ideas while I’m at it. 🙂

Regina’s Wedding Quilt

This week I made this quilt for my dear friend Regina.  Her son was married last June.  At the wedding she asked people to write marriage advice on cards she put on each table.  Then she printed the advice onto fabric.

Rooney upclose

A few weeks ago she sent me the printed fabric as well as a bunch of other fabrics with a note to put it together somehow.

When Regina gave me carte blanche to do what I wanted, one design came to mind.

PS-1I knew it would be perfect to frame the advice squares.

I’ve seen several of them that I like, this one and this one and this one;  I’ve been wanting to make one for years.  This was my chance.

With the fabric Regina sent me I made a light-dark, light-dark pattern.

PS-finished

I was able to quilt it and bind it and send it off in plenty of time before the newlywed’s first anniversary.

What do you think?

Watch for the pattern, I should have it up soon.

Sara’s quilt

I’m making a couple of quilts for my sister Sara.  She wanted me to use this clean, modern line of fabrics by Michael Miller.  Although they aren’t colors I seek out normally, I love them!  They have been fun to work with. The fabric is a little heavier than I normally use in a baby quilt,it is more like decorator fabric. It softened up beautifully when it was washed, however and if this is a well used quilt, it will be that much more durable.


mm-fabric-bekko


The patterns are large and I wanted to employ them in the best way possible.  I started by planning it with this Six Squares pattern but we wanted to use four different colors and the six squares didn’t allow me to use all the fabrics. So then I designed another quilt using more and smaller squares, using this and this as my inspiration, but no matter how I worked the design the squares were just too small.  So back to the drawing board, literally.  I went back to the Six Squares design and reworked it with eight squares.  It was just right.

I actually ended up making this quilt three times.  I made it in a lap size so I could work out all the bugs.  Then I made it in a baby size but didn’t notice the mistake with the orange square until it was already quilted and bound and I was taking pictures of it.  Ugh!!

sara's-quilt-mistake


I don’t understand it.  I looked at that quilt top for hours while I bound it.  I went over it every inch of it cutting all the tiny threads.  I held it up in a mirror after each block was sewn.  I guess I stopped looking at the design as a whole and just focused on the smaller pieces, until it was too late.

Luckily I cut out two of everything so that I could make a second quilt and Voilà!  Here is the finished product.

sara's-quilt


I’m really proud of it and can’t wait to mail it off.

What I learned?
Look at the pattern as a whole and not just the smaller pieces.