18 Nov 13


Ice-plant

After a happy, nostalgic weekend, I woke up today ready to knock out a busy week.

On my list:

  • Finish and mail unit quilt to Monique
  • Make quilt for baby shower this weekend
  • Make cake for baby shower this weekend
  • Get Paul’s birthday box together
  • Do last of the Thanksgiving shopping
  • Start two Christmas quilts
  • Go to lunch with Karla
  • Make giant wreath with Sue

I’ll report how I did next week.

I took the picture up there, at San Elijo, a beach where my family camped when I was a child.

Phases

four-phases2

When it comes to what I can do and what I can handle during deployments, I seem to go through several phases.

Phase One:  I’ve got this!

Of course there are more than a few days of sadness and cookie eating but then I pull myself together and face the months to come.  I plan trips and projects and activities to keep us all busy.  I continue with all the commitments we have in place and even add a few more.

Why not?  Paul’s is gone.  All that time I spend with him is now freed up to do other things right?

awesome

I miss Paul, especially on the weekends but I am energized and I’m facing the deployment like a champ! I work hard and play hard and every minute is full and Man! I get so much done!  This phase lasts about 4-6 months, overlapping a bit with Phase Two.

Phase Two: Survival Mode

During the first part of Phase Two I am still trying to juggle all of our Phase One activities but I’m getting really tired.  I mean exhausted tired.  I mean my feet are heavy, everything is hard, warming up leftovers in the microwave is too many steps, tired.  Most of the time I am just trying to get through the day and make it to bedtime.

Every morning, I mechanically face our day and I methodically check things off my list as we accomplish them.  If, however, anything goes wrong or something unplanned is added, it is almost impossible for me to adjust and I completely melt down.  I get angry and sad and feel like I’m letting down everyone around me, especially my kids.

sad

I can’t do everything right, and then my view of things gets skewed so I feel like I can’t do anything right.

This brings me to the second part of Phase Two, depression.  I find it hard to get out of bed.  Nothing sounds good to eat. There is nothing to look forward to.  Everything feels like a chore, even things I normally enjoy.  I see nothing but the long months stretched out ahead of me like eternity.  And I can’t find any good anywhere.  I just want Paul home, period.

I feel isolated and completely alone.  Minutes feel like hours, hours feel like days.  This part just sucks.

Then something magical happens; I start telling people no.  First with embarrassment and a feeling of failure and then with a feeling of empowerment and control.  Who am I trying to impress anyway?  I start making my life easier.  I pare back our activities to the absolute minimum.  Instead of signing up for the next sports/drama/music season, we take a season off.  I stop volunteering at school and at church.  We spend a lot of time in front of screens.  A lot of time.  The kids stop having friends over regularly.  Sleepovers are not even considered.

Phase Three: The Light at the End of the Tunnel  or Let’s Do This!

Although there is some overlap with Phase Two, Phase Three happens almost overnight.  All of a sudden, I can see the end.  I am counting in weeks instead of months, and then days instead of weeks.  I am thinking of the goals I made when Paul left and the time feels short.  I have to abandon some goals but work hard to finish the others.  I feel energized again and happy.  I am full of hope and excitement and I’m looking forward to our family being reunited and finding our new normal.

deal

I don’t take anything else on and I feel brilliant that I’ve simplified so well.  As I plan our time and commitments in the coming months, I am also considering the time when Paul will be home and more of my attention and focus will be needed here inside these four walls.

Phase Four:  He’s Coming Home!

This phase is the shortest but also the most emotionally complex.  I will write more about this as we get closer.

*Spoiler: It will end with something like this.

high five

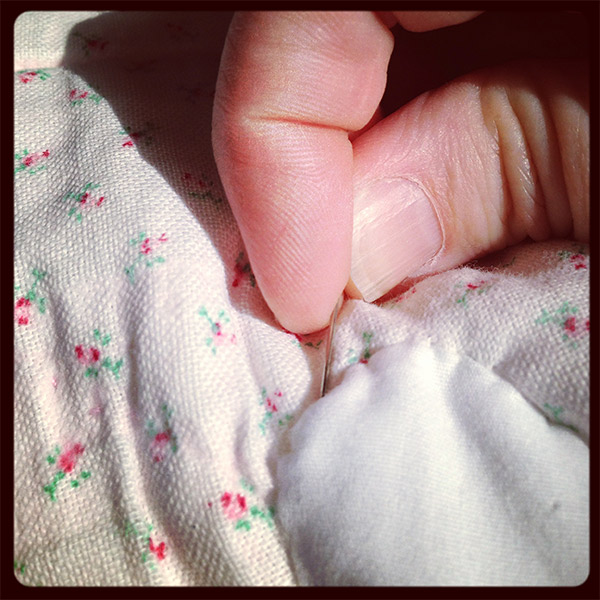
I just hit Phase Three and I’m feeling good.  I’m ready to face the holidays and the changes that are coming up in our family.  Things are good, well except that my sewing machine is broken but even that I can deal with.  We may get through this yet.

Liz’s Quilt

I can’t tell you how happy our family was when we found out that my sister in law Liz and brother Jared were expecting another baby.  It had been a long time in coming and it was a joyful, tearful, happy day.  Even now I can’t think about it without getting emotional.

liz-preg

Planning

Of course I was going to make my expected little niece a quilt.   When Liz and I talked about different quilts she might want for the nursery,  she remembered that she had an old quilt that she wanted to repurpose.  She hadn’t seen it for a while and she wasn’t sure if she could even track it down and if she did track it down, she wasn’t sure if it would even be useable.   She found it though (yea!) and sent it to me.

It was large for a baby quilt, about 55′ x 55′, and has a faded pale pink, almost white back ground with a tiny pink rosebud print.  So so sweet.  It had also been hand quilted, I love that.

Before it had come into her possession this quilt had obviously been well loved and well used.  There is something so lovely about that.  Knowing that something was loved or maybe a comfort to some little girl, now all grown up.

Liz's-quilt

Prep

The blanket was not in good shape.  The edge of one side was torn and there were spots all over the quilt, large and small, where the fabric was worn through or very thin.  There were also quite a few brown, milk stains.

The first order of business was to get rid of the stains.  Nothing worked very well until I soaked it in Oxyclean.  And for the darker spots I had to concentrate the powder directly on the spot.  It worked.

Getting stuck

So now I had a clean blanket and I had seen the larger holes but when I looked at it closely, there were little tiny holes were everywhere.  If they weren’t on one side, they were on the other.  I didn’t see how I was going to get even a baby sized quilt out of it.

I thought my only choice was to cut it into useable pieces and piece it with other fabrics.  That bummed me out.  It would be almost impossible to preserve the hand quilting and I wasn’t sure how this old fabric would look and feel with new fabric.

There was one area of the quilt that only had a few small holes, and holes are holes, but then . . .

Light bulb!

I thought about appliqué!  I could appliqué small patches over the little holes!

Once I thought of that, it only took a few hours to finish.  I cut the piece, put a binding of white on it and then appliquéd three little hearts over the holes.  Below is my Instagram finishing up one of the appliqués.

Untitled-4

This is the first quilt I’ve ever repurposed and although it was a challenge, I loved doing it and am so happy with the final product.

The story doesn’t end there.

Just the other day I got this text from Liz.

Liz: Just found out that old blanket? My great grandmother quilted it for my mother when she was a little girl. How sweet is that???  So glad we were able to revive it!!!

Me: That is so wonderful! I thought it was a thrift store find!

Liz: So it will be made by our daughter’s great great grandma (who was married to Henry Call, our Henry’s  namesake)

Me: I’m glad I saved the quilting and didn’t pull it out.  Hand quilted by your great grandmother.  Her very own stitches.  It’s making me cry.

I feel privileged that I was able to be a part of this sweet story and can’t wait to get my hands on my little niece.

Quilt Rule #7

Use Texture

This one is more of a tip than a rule.  Quilting fabric is wonderful, of course, but consider shaking things up and throw some textured fabrics into your next quilt.

This is a quilt that my sister Sara made for my daughter Sara, when she was born.  It is one of my very favorite things made by one of my very favorite people.  Although the design is simple and the fabrics are monochromatic, she added interest and movement to it by using textured fabrics.

Use-texture

Look at all the different textures she used.  In this closeup shot you can see waffle fabric, two different kinds of damask, crushed silk, linen and satin.  She didn’t stop there, she then added depth by sewing tiny cream rosettes into the corners of each square.  Then she went even further buy adding lace to the edge (see above) to make the perfect quilt for our baby girl.


use-texture-3

The back of the quilt is one large piece of cream satin so it was soft and luxurious and just right for a baby’s sensitive skin.

Ever practical, Sara also made sure that all the these fabrics were washable, as babies are not always clean and tidy.  She knew if I used this quilt it would eventually need to be washed.  I did use it and I washed it again and again.  She chose well because, as you can see, it still looks brand new even though it is 13 years old.

So try using texture in a quilt.  I’d love to hear how it works for you.


Quilting rule #6

IRON TOWARD THE DARK

This is a simple tip but it is an important one.  After sewing a light and dark piece of fabric together, iron your seam toward the dark fabric. This will keep uneven, dark seams from peeking out through the lighter fabric.

See this cute table runner I made for Christmas a few years ago?

xmas-tablerunner

Well if you look closely you can see the red visible through the white fabric in several places on the quilt.  Boooooooo!


Iron-toward-the-dark


You may be thinking, “I’m not going to look at anything that closely.” But trust me, you can see it without being very close at all.  And it’s a bummer every time I notice it.

Iron toward the dark.

See Ya Summer!

diamondbacks

The arrival of Autmn is making me take stock of what I was able and not able to accomplish this summer.

New York with Robin and Monique

Quilt for Rooney Wedding

Groom’s cake for Rooney Wedding

Hire Photographer

Edit first round of deployment interviews

Swim laps or yoga 5 times a week, a few times a week, at least once a week

Gloria swim lessons

Get the dog fixed

Sara swim/dive team, girl’s camp

Dan tech camp/Havasupai/band camp

Girls volleyball camp

Cousin’s week

Jean’s Quilt

Sara’s Quilt

Lexy’s Quilt

Liz’s Quilt

Kids ready for school

Sell van

Write five quilt patterns 1  2  3  4  5

Sell motorcycle

Buy a car

Go to Coronado

Big kids to Europe

Launched Yellow Bug Quilts (This was huge included hundreds of tasks and decisions, large and small.)

Scan giant box of photographs

Go to Provo and hang with the Stanleys

Go to a Diamondbacks Game

Organize quilt room

I could not have crossed those last two off the list without the help of Grandma and Grandpa Mac and I got them in just under the wire.  Thanks again!

Whew!  I scheduled all of us up to our eyeballs. Don’t worry the kids still managed to watch too much TV and play too many hours of video games.

It was a good summer.  It kept me (us) busy and helped the time go by quickly.  By the time school started, however I was exhausted and for the first week or so I just sat on the couch and watched TV.

Now I’m looking forward to Autumn and my plate is filling up fast plus I a have all the things that didn’t get crossed off the summer list.  I’m not complaining.  Anything that helps February get here a little quicker is a good thing. I’m thankful to have lots to do.

Photo by Donna Stanley McEvoy  (My mom)

Quilt tip #5

Consider Using Sheets

PB-kids

There is nothing like working with good fabric made specifically for quilters however, don’t turn your nose up at sheets or sheet sets.

There are several reasons I like to use bedding:

1.  Sheets are almost always 100% cotton that do not shrink.

2.  Any prints are made to be heavily used and washed, without fading.

3.  They come in great, coordinating sets and if you need a solid, lots of different colors.

4.  I get to decide what thread count I want to use.

5.  They start in large single pieces so there is no seam nor is there a need for a design on the back.

6.  They can be much less expensive that the same amount of fabric from a quilt store.

7.  When I want to make a cozy Christmas/Winter quilt, seasonal flannels are awesome.

I love using sheets sometimes.  I especially love them for whites and creams. And you can’t beat them for classic stripes and polkdots.

My favorite finds have been at TJ Maxx/Marshall’s and Pottery Barn Kids (clearance).

What is your take?  Do you ever use sheets in your quilting?

Photo: PB kids online catalog

Lexy’s Quilt

Lexy-Ward-from-The-Proper-Pinwheel


I met Lexy of The Proper Pinwheel a little over a year ago when we worked together for Alt Design Summit.  Lexy  is smart and creative and has such a great sense of humor.

I described her to someone this way, “She has impeccable taste in style and design with a little whimsy and silliness thrown in to surprise you and make you smile.”  I think the picture up there is a perfect example of what I mean.

I was so excited for Lexy when she announced that she and her husband were expecting their first baby.  Is there anything more fun than a new baby?! My answer would be, “No, there is nothing more fun.”

I was planning to make a quilt for Baby Girl Ward already and at the same time I was getting ready to launch Yellow Bug Quilts.   I reached out and asked if she would be willing to be my Guinea Pig and walk through the custom process with me.  She might as well have a say in what she wants right?

Starting from Scratch

Initially Lexy told me a little about what she had in mind for her nursery, and she sent me pictures of the fabrics she wanted to use as well as a picture of a quilt that she liked.  Most of the fabrics were from Sarah Watson’s Indian Summer line.  It captures an outdoorsy feeling with a childlike look that make it perfect for a nursery.

start-to-finish-vert

I went to work on some designs.  We emailed back and forth with different design ideas and played with several elements of the fabric patterns.  I have to say I got a little stuck here.  I couldn’t see how the fabrics were going to work together because I couldn’t be sure about the scale and exact colors.  I finally just went and bought a little bit of each of the fabrics.  All of it made so much more sense to me once I had the fabrics in front of me.

We continued to pass ideas back and forth until we agreed on this design.

lexy's-design-blog


It is always interesting so me to see the collaborative process work and to watch a project evolve from a few fabrics to design ideas and, in this case, on to a finished quilt.

Construction

Once we settled on a design, I started sewing.

The main design was fairly simple and it came together quickly. The flying geese added the texture and movement to the design and that part was a little more time consuming than the large design but it was absolutely worth the effort.

In fact, once I learned the piecing process, it became relaxing and I spent a lovely day moving from sewing machine to ironing board to cutting table and back to the sewing machine.  Time *ahem* flew by.  I enjoyed myself so much I couldn’t believe it when my daughters got home from school.  I totally wasn’t expecting them for two or three more hours. Ha!

I look forward to making another quilt with lots of flying geese.

My normal MO is to see a quilt I like and reproduce it or at least elements of it. This is the very first quilt I have made/designed from start to finish and I am happy to report that it was a very satisfying endeavor.

I’m so thrilled with how it turned out and how it compliments Lexy’s nursery.  And how cute are those bumper pads??

Lexy's-quilt


What about you? Have you ever designed your own quilt? How did it turn out?

Quilt Rule #4

You’re going to make some ugly quilts. I don’t say this to intimidate or discourage anyone but I need to share some tough love with you here. I wish someone had told me that some of my well-thought-out and perfectly-planned efforts were going to turn out some real stinkers, and that it is okay. This quilt for example, it one of my worst.

ugly-quilt

Now before I say anything else I need to say that I really like pastels when I see them.  They are sweet and deliver to my mind thoughts of new babies, springtime and Easter.  Having said that, I rarely purchase them.  I tire of them quickly and don’t have a single shred of pastel in my house or wardrobe. When I was choosing fabrics for this quilt however, I was trying to reach out of my comfort zone and work with fabrics I wasn’t naturally attracted to. Well, you can see that the result wasn’t good.  It is pretty devastating when I come to the realization that whatever I have been working on is terrible and that I have been wasting my time.  Experience has taught me that I learn something new every.single.time I make something. With this quilt, I learned several things:

First, I really don’t like working with pastels.  I tire of them even more quickly than I thought I did.  It got to the point that it was chore to get this stuff out to work on it.  That’s never good.  I learned again that if I don’t like looking at it, chances are, I’m not going to finish it.

Second, there isn’t even the tiniest bit of white space for my eyes to rest.  My eyes just dart around hoping for relief that never comes.  I thought that the striped blocks would add the pattern and the solid blocks would add the stillness.  Yeah, I was wrong.  Ugh! I’m getting a headache just looking at it on the screen.

ugly-closeup

Third, I learned that I needed to stop being afraid of white space and embrace it.   The next 20 quilts I made, I did nothing but experiment with white space.

If I liked the colors of this quilt more I think I would take it apart, add some white space to it and finish it, but instead I think it is on it’s way to Goodwill. I hope it finds its way into the hands of a lovely seamstress/quilter who can’t ever get enough pastels and will make something wonderful from what I started. So my advice when you make an ugly quilt, and you will??  Cut your losses, learn what you can from it and move ahead to the next project.

Bibs

watermelon-bib


So my friend Sue makes these darling bibs and yesterday I went to her house and she taught me how to make them.  We used the Slobber Monkey pattern from Heather Bailey at mynameisheather.com (which is my new favorite website) and used fabrics that we already had.

We needed two pieces about 10″ x 12″ and batting. It is such a great way to use up smaller pieces in your stash.

It took me about an hour to do my first one.  Once I understood what I was doing, I was making them in about 30 minutes.

I came home from Sue’s and made another watermelon bib and three more!  How cute is the elephant one?

I’ll admit it, I may be just a little obsessed.

 
4-bibs